Introduction
Dynamic Domain Name System (DDNS) is a service that helps to automatically update the IP address of a domain name. The IP address is a crucial aspect of the internet as it acts as an identifier for a device or a website.
In today’s world, most of the devices are connected to the internet and it is becoming increasingly common for people to host their own websites or run services like a media server, game server, or a VPN, etc. on their home network.
However, the problem arises when you have a dynamic IP address which keeps changing, making it impossible to access the website or service with the same URL.
This is where DDNS comes into the picture. By using DDNS, you can map a domain name to your dynamic IP address, and when your IP address changes, the DDNS service updates the mapping automatically.
Having a DDNS service is useful for individuals who want to run their own server at home or for small businesses who want to run their website on a server in their office. By using a DDNS service, you can make your services accessible to the internet even if your IP address changes.
In this article, we’ll discuss how to create a DDNS using Cloudflare DNS API, which is a popular and reliable DDNS service.
Enter Cloudflare
Before we dive in, make sure you have a Cloudflare account. If you don’t have one, sign up for a free account.
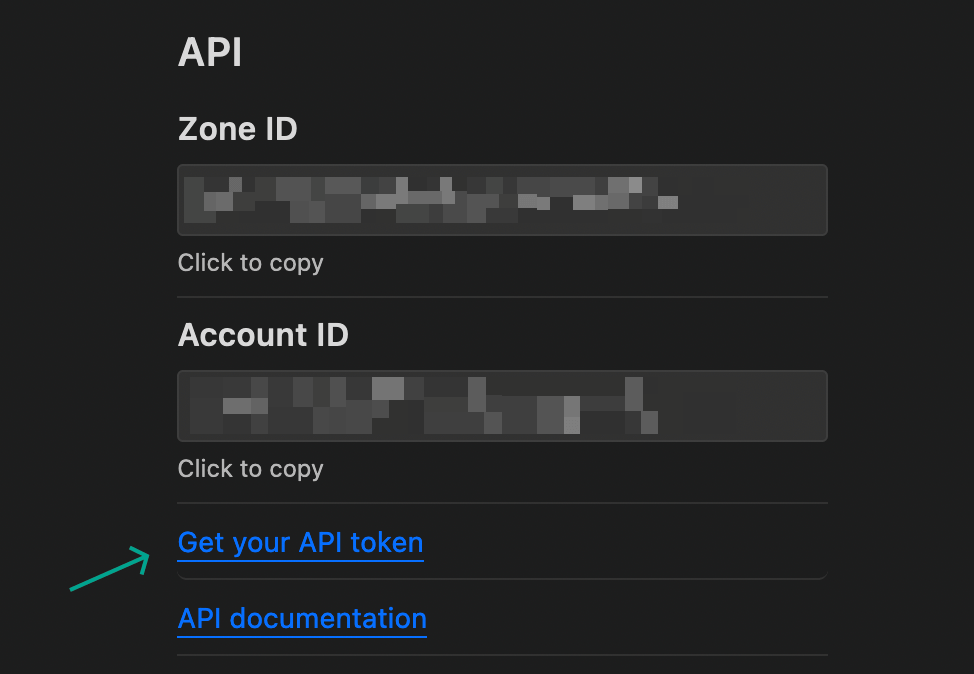
Once you have an account, log in and go to the API Tokens section.
Create a new API token with the “Edit Zones” and “Zone Resources” permissions.
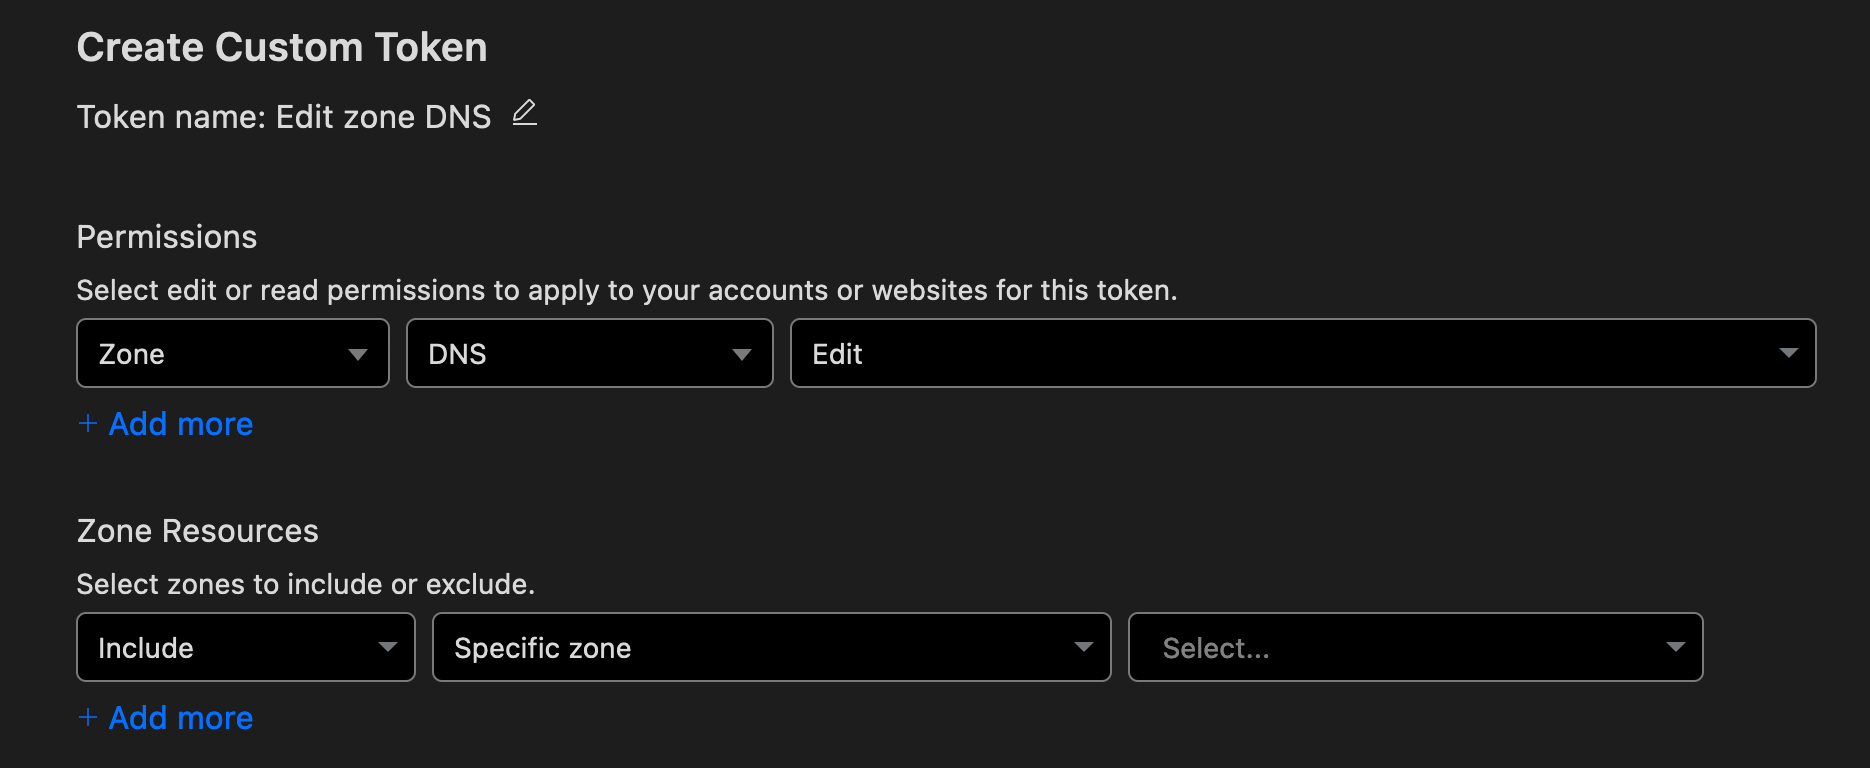
Make sure to keep the API token safe and secure as it gives full access to your Cloudflare account.
Now, let’s start by creating a script to update the IP address on Cloudflare. This script will run every 5 minutes via cron job and update the IP address if it has changed.
#!/bin/bash
## Define your Cloudflare API key and emailCLOUDFLARE_API_KEY=your_api_keyCLOUDFLARE_EMAIL=your_email
## Define the domain and record you want to updateDOMAIN=your_domain.comRECORD=your_record
## Get the current public IP addressIP=$(curl -s https://cloudflare.com/cdn-cgi/trace | grep -E '^ip' | cut -d = -f 2)
## Get the current IP address on CloudflareCF_IP=$(curl -s https://api.cloudflare.com/client/v4/zones/$DOMAIN/dns_records/$RECORD \  -H "X-Auth-Email: $CLOUDFLARE_EMAIL" \  -H "Authorization: Bearer $CLOUDFLARE_API_KEY" \  -H "Content-Type: application/json" \  | jq '.result.content' \  | tr -d \")
## Update the IP address on Cloudflare if it has changedif [ "$IP" != "$CF_IP" ]; then  curl -s https://api.cloudflare.com/client/v4/zones/$DOMAIN/dns_records/$RECORD \    -X PUT \    -H "X-Auth-Email: $CLOUDFLARE_EMAIL" \    -H "Authorization: Bearer $CLOUDFLARE_API_KEY" \    -H "Content-Type: application/json" \    --data "{\"type\":\"A\",\"name\":\"$RECORD\",\"content\":\"$IP\"}"fi
Replace your_api_key, your_email, your_domain.com, and your_record with your own values in the script.
This script uses the curl command to make API calls to Cloudflare. The jq command is used to parse the JSON response from the API. You need to install jq by running sudo apt-get install jq if it’s not already installed.
Save the script as cloudflare-ddns.sh and make it executable by running chmod +x cloudflare-ddns.sh. Test the script by running ./cloudflare-ddns.sh. If it runs without errors, you should see the IP address updated on Cloudflare.
Finally, add the script to crontab to run 5 minutes. Run crontab -e and add the following line:
*/5 * * * * /path/to/cloudflare-ddns.shConclusion
In conclusion, creating a DDNS with Cloudflare DNS API is an efficient and straightforward process. With the help of the script provided in this article, you can automate the IP address updates for your domain and ensure that your domain always resolves to the correct IP address.
This makes it easy to access your home network devices remotely without having to worry about changing IP addresses.
Using Cloudflare’s API provides added security and reliability compared to other DDNS providers, ensuring that your domain remains accessible and protected.