Introduction
I have been working on my Homelab for a while now and one of the crucial component of my Homelab is an Nginx reverse proxy. I use this to access all my services from subdomains like jellyfin.sukuna.lan instead of sukuna.lan:8096.
This is a very common setup and you can find a lot of tutorials on how to setup an Nginx reverse proxy. If you are using a custom domain then it becomes really easy to setup HTTPS with Let’s Encrypt. But if you are using a local domain like me then you will have to use self-signed certificates.
Now there are lots of ways where you can run into issues with self-signed certificates, and through this guide I will be trying to explain my current setup of how I am generating and using self-signed certificates for my Homelab services.
Setting up a CA (Certificate Authority)
The first step is to setup a CA (Certificate Authority) which will be used to sign the certificates for our services. We will essentially become a CA and then sign the certificates for our services.
To do this we will be using the openssl command. If you are on a Debian based system then you can install it using the following command.
sudo apt install opensslOnce you have installed openssl we will create a key for our CA. This key will be used to sign the certificates for our services.
openssl genrsa -aes256 -out ca-key.pem 4096This will create a key with the name ca-key.pem which will be used to sign the certificates for our services. You will be asked to enter a passphrase for this key. Make sure you remember this passphrase as we will be using it later.
Now we will create a public certificate for our CA. This certificate will be used to sign the certificates for our services.
openssl req -new -x509 -sha256 -days 3650 -key ca-key.pem -out ca.pemThe output will be a ca.pem file which will our public certificate of the CA.
Creating a certificate for our service
Now that we have setup our CA, we will create a certificate for our service. In this example we will be creating a certificate for all my services which are running on all of the domains in my Homelab which are sukuna.lan, suguru.lan and satoru.lan as of now.
So we will be creating certificate for the apex domain sukuna.lan, suguru.lan, satoru.lan and wildcard certificates for *.sukuna.lan, *.suguru.lan and *.satoru.lan. This is to ensure that we can use the same certificate for all our services.
To do this we will first create a key for our service.
openssl genrsa -out cert-key.pem 4096This will create a key with the name cert-key.pem which will be used to sign the certificate for our service.
Now we will create a certificate signing request for our service.
openssl req -subj "/CN=yourname" -sha256 -new -key cert-key.pem -out cert.csrYou can add anything in the CN field. I just used my own name when I created the certificate signing request.
Once we have the CSR created, we will create a extfile with all the alternative names for our service. The usual syntax of this file looks like this:
subjectAltName = DNS:yourdomain.com,DNS:www.yourdomain.com,IP:192.168.0.101For me, since I wanted to create for all my domains and subdomains, I created a file with the following content:
subjectAltName = DNS:sukuna.lan,DNS:*.sukuna.lan,DNS:suguru.lan,DNS:*.suguru.lan,DNS:satoru.lan,DNS:*.satoru.lanSo go ahead and create this file as per your requirements.
Once we have all this in place, we will start creating our self signed certificate for our service.
openssl x509 -req -sha256 -days 3650 -in cert.csr -CA ca.pem -CAkey ca-key.pem -out cert.pem -extfile extfile.cnf -CAcreateserialRunning this will ask for your passphrase which you entered while creating the key for the CA. Enter that password and post that it will create a certificate with the name cert.pem which will be used by our service to serve over HTTPS.
Notice that here, as well as while creating certificate for the CA, I used the
-daysflag to set the validity of the certificate. This is because by default the validity of the certificate is set to 30 days.So if you are using this certificate for your services then you will have to recreate the certificate every 30 days. To avoid that, I have set it to 3650 days which is roughly 10 years.
Finally we will just create a fullchain.pem file which is basically the combination of our certificate and the cert key file that we generated.
cat cert.pem cert-key.pem > fullchain.pemNow we have these two files, fullchain.pem and cert-key.pem which we will use in the next step to tell our Nginx reverse proxy to use these certificates.
The intent layer for B2B outbound

CatchIntent spots real buying signals on LinkedIn and gives you a short daily list of in-market buyers, scored and with the opener drafted. You just send.
Using the certificates in Nginx
So now that we have our certificates ready, we will use them in our Nginx reverse proxy. I am assuming that you already have an Nginx reverse proxy setup and you are using it to access your services.
I am taking Nginx as an example of reverse proxy here because that is what I use. But you can use any reverse proxy of your choice and swap the steps with the steps for your reverse proxy.
So first we will create a directory where we will store our certificates.
sudo mkdir -p /etc/nginx/certsNow we will copy our certificates to this directory.
sudo cp fullchain.pem /etc/nginx/certssudo cp cert-key.pem /etc/nginx/certsNow we will create a snippet which will be used to tell Nginx to use these certificates.
sudo nano /etc/nginx/snippets/self-signed.confAnd add the following content to this file.
ssl_certificate /etc/nginx/certs/fullchain.pem;ssl_certificate_key /etc/nginx/certs/cert-key.pem;Next, we will create a snippet which will be used to tell Nginx to redirect all HTTP requests to HTTPS.
sudo nano /etc/nginx/snippets/ssl-params.confAnd add the following content to this file.
ssl_protocols TLSv1 TLSv1.1 TLSv1.2;ssl_prefer_server_ciphers on;ssl_ciphers "EECDH+AESGCM:EDH+AESGCM:AES256+EECDH:AES256+EDH";ssl_ecdh_curve secp384r1;ssl_session_cache shared:SSL:10m;ssl_session_tickets off;ssl_stapling off;ssl_stapling_verify off;add_header X-Frame-Options DENY;add_header X-Content-Type-Options nosniff;
ssl_dhparam /etc/nginx/certs/dhparam.pem; # Add this file if you have generated a dhparam.pem file
I have added a dhparam.pem file in the above snippet. This is because I generated a dhparam.pem file using the following command.
sudo openssl dhparam -out /etc/nginx/certs/dhparam.pem 4096This is not required but it is recommended to use a dhparam.pem file. You can read more about it here ↗️.
Next, we will use these snippets in our Nginx server config file. So for example in my case for exposing jellyfin.sukuna.lan I have the following config file.
sudo nano /etc/nginx/sites-available/sukuna.lanAnd the content of this file is as follows.
server {    listen 80;    server_name jellyfin.sukuna.lan;
    return 307 https://$server_name$request_uri;}
server {    listen 443 ssl http2;    server_name jellyfin.sukuna.lan;
    set $UPSTREAM_IP 192.168.0.100;    set $UPSTREAM_PORT 8096;
    include snippets/self-signed.conf;    include snippets/ssl-params.conf;
    location / {        proxy_pass http://$UPSTREAM_IP:$UPSTREAM_PORT;    }}
With this in place, we will verify our config with sudo nginx -t and if everything is fine then we will reload Nginx with sudo systemctl reload nginx.
Now if you try to access jellyfin.sukuna.lan then you will see that it is accessible over HTTPS.
But wait, there is one more thing that we need to do. If you try to access jellyfin.sukuna.lan then you will see that the browser will show a warning that the certificate is not trusted.
This is because it is an self signed certificate and the browser does not trust the Certicate Authority (CA) which signed this certificate. So we will have to add this CA to the list of trusted CAs in our browser.
Adding the CA to the list of trusted CAs
For Linux
If you are using Linux then you can add the CA to the list of trusted CAs by copying the ca.pem file to the /usr/local/share/ca-certificates/ directory.
sudo cp ca.pem /usr/local/share/ca-certificates/ca.crtAnd then running the following command.
sudo update-ca-certificatesThis will add the CA to the list of trusted CAs in your Linux system.
For Windows
If you are using Windows then you can add the CA to the list of trusted CAs by copying the ca.pem file to the Trusted Root Certification Authorities folder.
Assuming that the path to your ca.pem file is C:\ca.pem, you can run the following command to add the CA to the list of trusted CAs.
Import-Certificate -FilePath "C:\ca.pem" -CertStoreLocation Cert:\LocalMachine\RootFor Mac
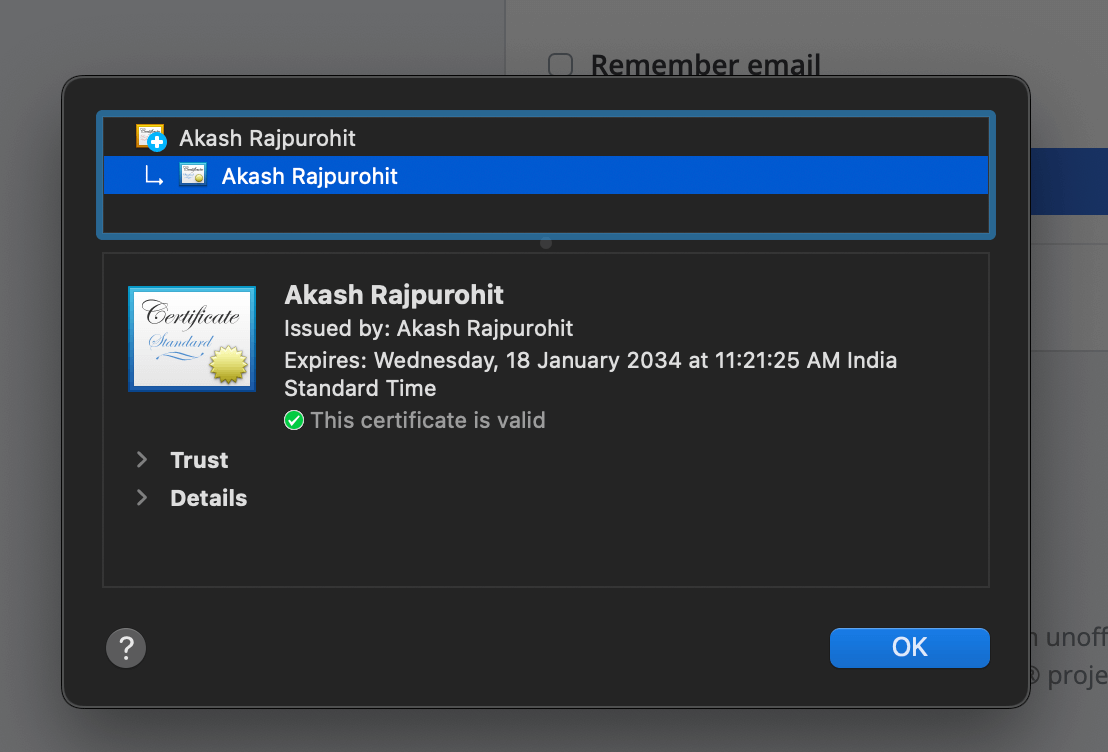
For Mac, you can use the “Keychain Access” app to add the CA to the list of trusted CAs.
Open the “Keychain Access” app and then go to File > Import Items and then select the ca.pem file. Once you have imported the file, you will see that the CA is added to the list of trusted CAs.
Once imported you can double click on the CA and then set the trust level to Always Trust.
Once you have done this, you will see that your browser will now trust the certificates signed by this CA.
For Android
For Android, open the “Settings” app and then go to Settings > Security > Encryption & credentials > Install from storage and then select the ca.pem file. Once you have imported the file, you will see that the CA is added to the list of trusted CAs.
Now when you open the browser, you will see that the browser will trust the certificates signed by this CA and you will be able to access your services over HTTPS without any issues.
Conclusion
So this is how I am using self-signed certificates for my Homelab services. I hope this guide was helpful to you and you were able to setup HTTPS with self-signed certificates for your Homelab services.
Once again, I understand this seems a tedious process but it is a one time process and you will have to do it only once. And it is worth it because now you can access your services over HTTPS without any issues.
And if you are using some services which absolutely needs a HTTPS connection in order to work then you can use this method to setup HTTPS for those services.
Hope you enjoyed this article. If you have any questions or suggestions, feel free to reach out to me on Twitter ↗️ / Reddit ↗️.
See you in the next one. 👋