Introduction
Welcome to another blog post in the series of self-hosted applications. In this post, I will introduce you to PairDrop, a self-hosted file transfer service that allows you to transfer files between devices seamlessly. It is a great alternative to services like Airdrop, Snapdrop, and ShareDrop.
Often, I find myself in a situation where I need to quickly transfer some files from my phone to my laptop or vice versa and resort to the traditional methods like email, bluetooth, USB or cloud storage to temporarily store the files. This makes the process cumbersome and time-consuming. PairDrop solves this problem by providing a simple and easy-to-use interface to transfer files between devices.
In this post, I will show you how to set up PairDrop on your server and use it to transfer files between devices.
What is PairDrop?
PairDrop ↗️ is a self-hosted file transfer service that allows you to transfer files between devices seamlessly. It is a great alternative to services like Airdrop, Snapdrop, and ShareDrop.
When sending files in the same network, PairDrop uses peer-to-peer connections with WebRTC. When sending files over the internet, PairDrop uses a server as a relay. This ensures that your files are transferred securely and quickly.
This makes PairDrop a great tool for transferring files between devices without the need for cloud storage or USB drives and yet maintaining privacy and security.
Setup PairDrop with Docker
I have been hosting PairDrop on my server for a while now and it has been working great. Here is how you can set up PairDrop on your server using Docker.
The docker-compose file for PairDrop is pretty straightforward and simple. Create a new directory for PairDrop and create a docker-compose.yml file with the following content:
services: pairdrop: image: 'lscr.io/linuxserver/pairdrop:latest' container_name: 'pairdrop' ports: - '3000:3000' environment: - PUID=1000 # UID to run the application as - PGID=1000 # GID to run the application as - WS_FALLBACK=true # Set to true to enable websocket fallback if the peer to peer WebRTC connection is not available to the client. - RATE_LIMIT=false # Set to true to limit clients to 1000 requests per 5 min. - RTC_CONFIG=false # Set to the path of a file that specifies the STUN/TURN servers. - DEBUG_MODE=false # Set to true to debug container and peer connections. - TZ=Asia/Kolkata restart: unless-stoppedSince I am not exposing PairDrop to the internet, I have not set up any authentication or rate limiting. If you plan to expose PairDrop to the internet, I recommend setting up authentication and rate limiting to prevent abuse.
To start PairDrop, run the following command:
docker-compose up -dThis will start PairDrop on port 3000 or the port you have specified in the docker-compose.yml file.
Turn social conversations into qualified leads
AI monitors Reddit, Hacker News, and Bluesky 24/7 to find people actively looking for solutions like yours — delivered to Slack or email before competitors notice.
Using PairDrop
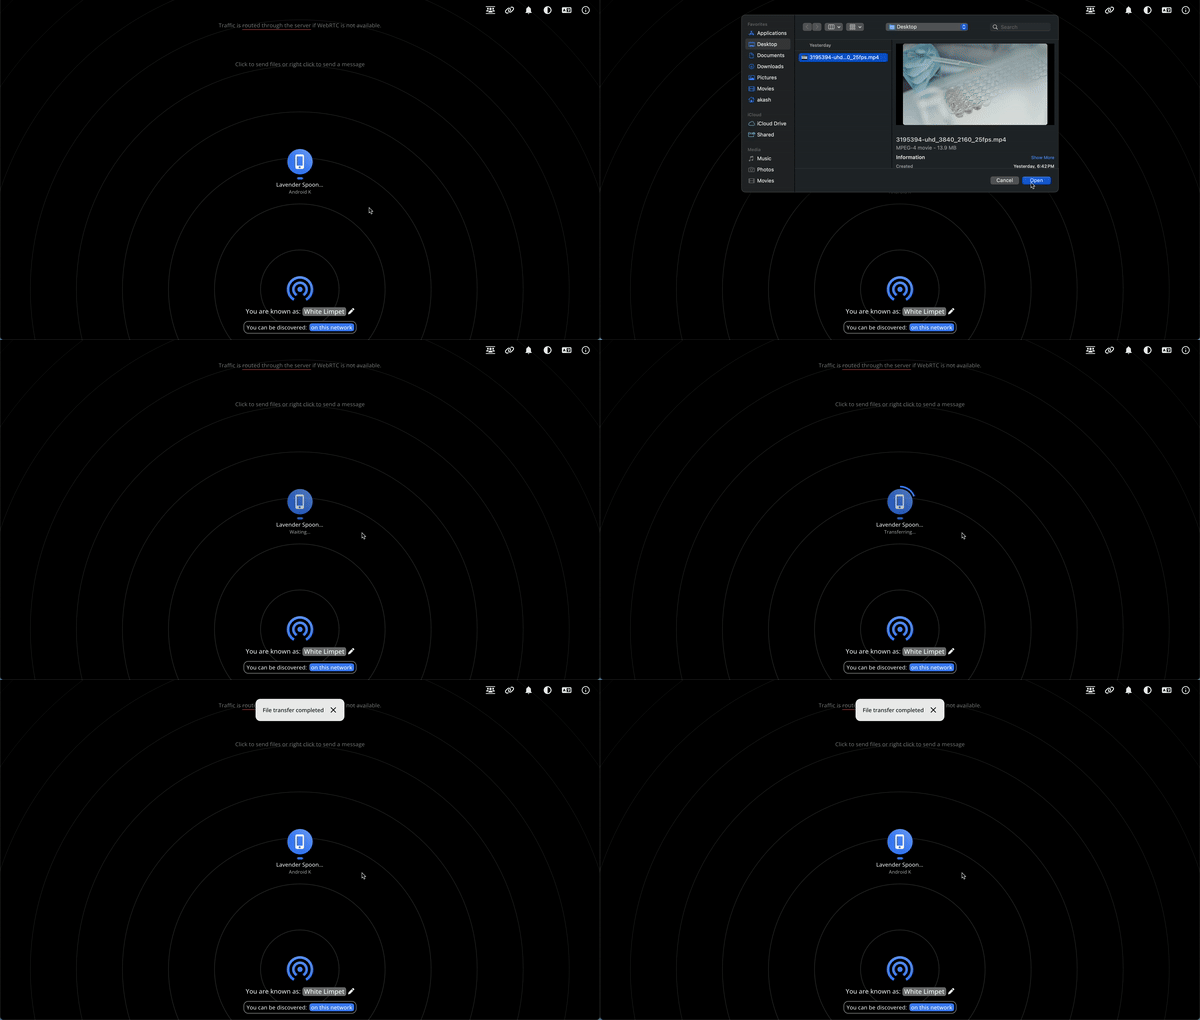
Once PairDrop is running, you can access it by visiting http://<server-ip>:3000 in your browser. You will see a simple interface with a drop zone to drag and drop files to transfer.
Open the same URL on another device in the same network and you will see the same interface but with the other device’s name displayed. You can now drag and drop files to transfer between the two devices. Once transfer is initiated, you need to first accept the transfer on the receiving device before the file is transferred.

Conclusion
PairDrop is a dead simple and effective way to transfer files between devices seamlessly and have helped me save a lot of time and effort. Its a great addition to my self-hosted tools and I highly recommend you give it a try.
I am curious to know how you transfer files between devices. Do you use cloud storage, USB drives, or any other method? Let me know in the comments below. If you have any questions or comments, feel free to reach out to me on Twitter ↗️ / Reddit ↗️.
Happy PairDropping! 🚀