Introduction
Once a wise man said, “If you are real nerd, sign your git commits with GPG ↗️”. I am not sure if that wise or not but I am sure that GPG is a powerful tool that allows you to encrypt and sign your data and communications.
In this post, I will explain what GPG is and why and how you can start using it in your workflows.
What is GPG?
GPG stands for GNU Privacy Guard ↗️. It is a free and open-source implementation of the OpenPGP standard. GPG is a tool that allows you to encrypt and sign your data and communications. It is widely used to secure email communication, software packages, and other sensitive data.
GPG uses a combination of symmetric-key cryptography and public-key cryptography to secure your data. Symmetric-key cryptography is used to encrypt and decrypt data, while public-key cryptography is used to securely exchange encryption keys.
Where is GPG used?
If you download software packages from the internet, you may have noticed that some of them are signed with a GPG key. This is done to ensure that the software package has not been tampered with during the download process.
By verifying the GPG signature of the software package, you can be sure that it has not been modified by a malicious actor. The package authors use their GPG key to sign the software package, and you can use their public key to verify the signature.
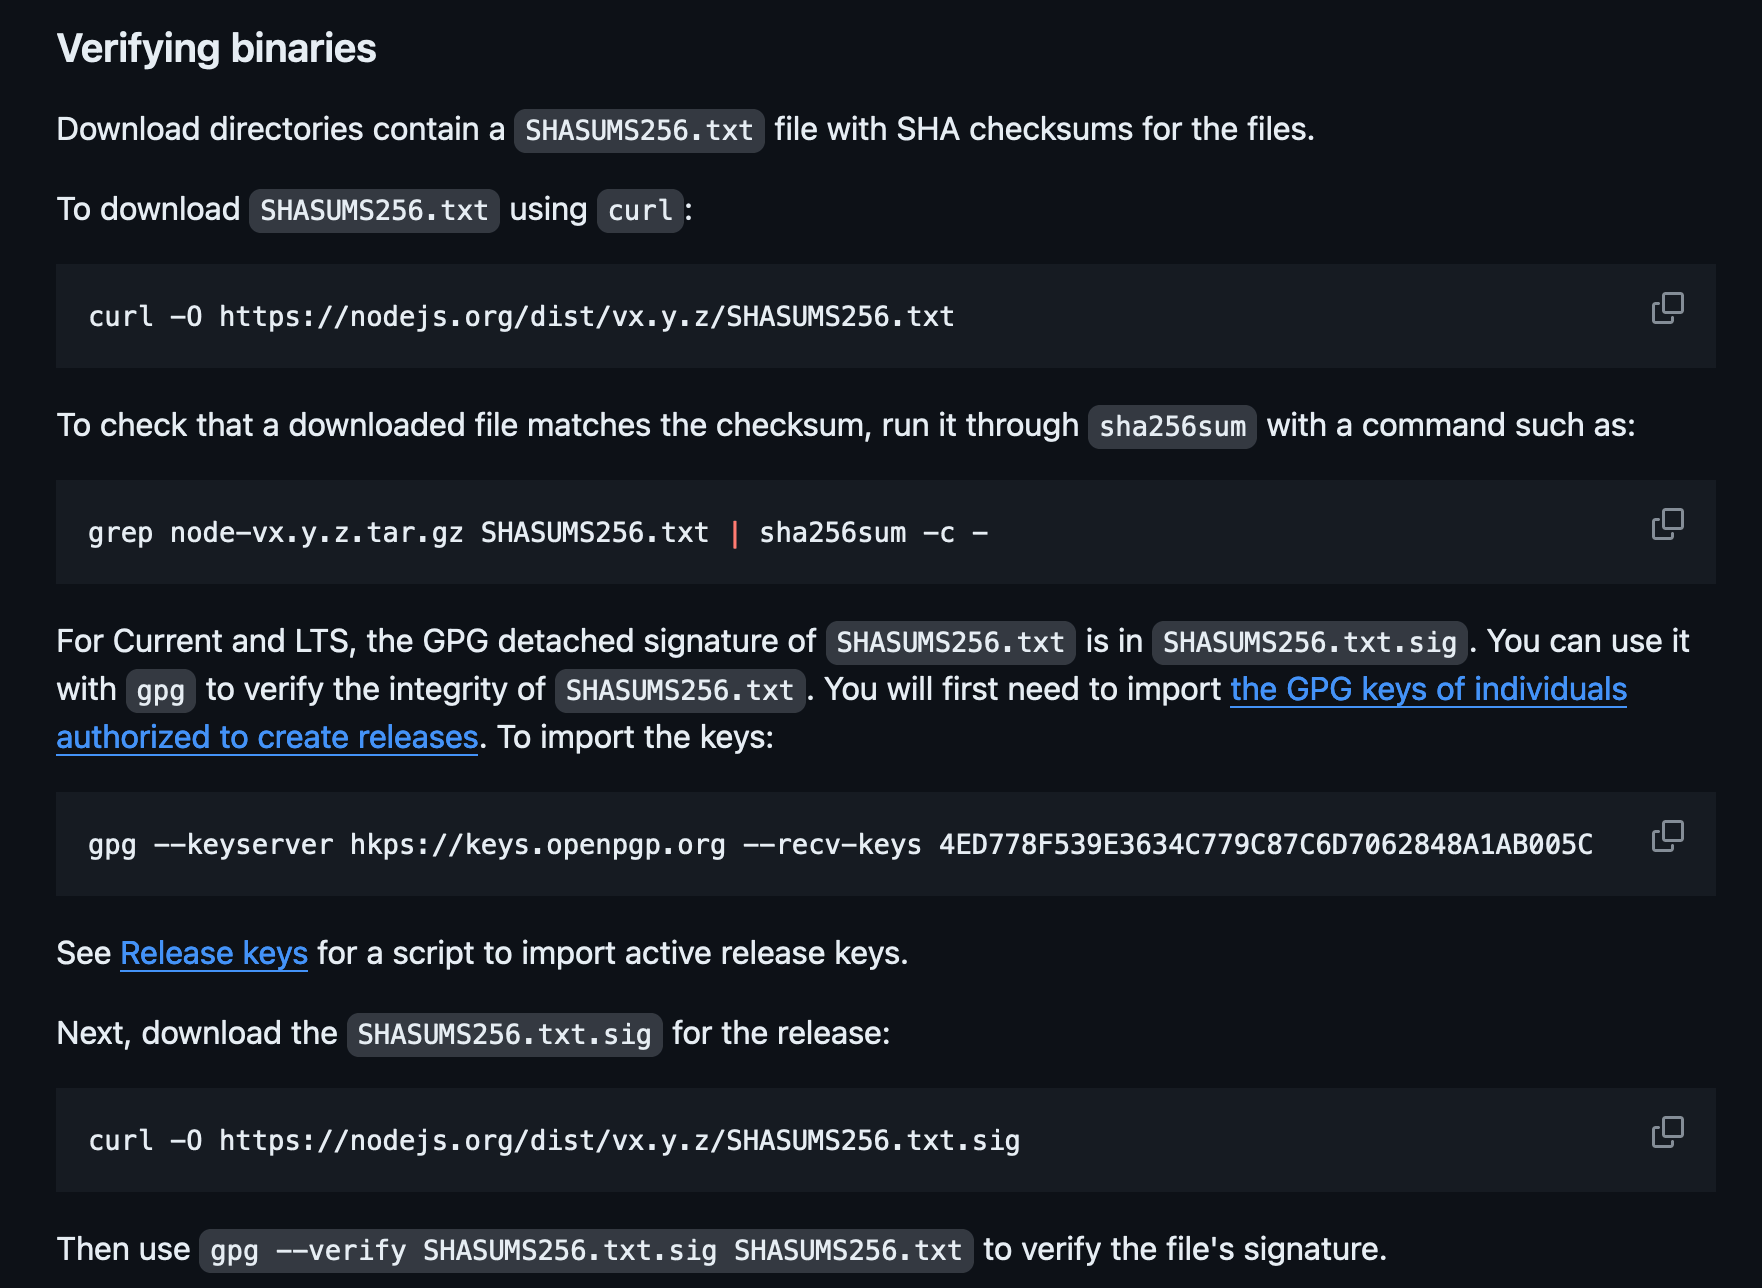
The more popular a project is the more likely it is to be targeted by malicious actors. For example, the Nodejs project explicitly specifies how to verify the GPG signature of the Nodejs binaries in their readme ↗️
Just like signing packages, you can also sign your git commits with GPG. This is done to ensure that the commit has been made by you and not by someone who just used your name and email address (And yes this is easily possible for anyone to do).
When you sign your commits with GPG, you are adding an extra layer of security to your git repository. This is how your commits look like when you sign them with GPG
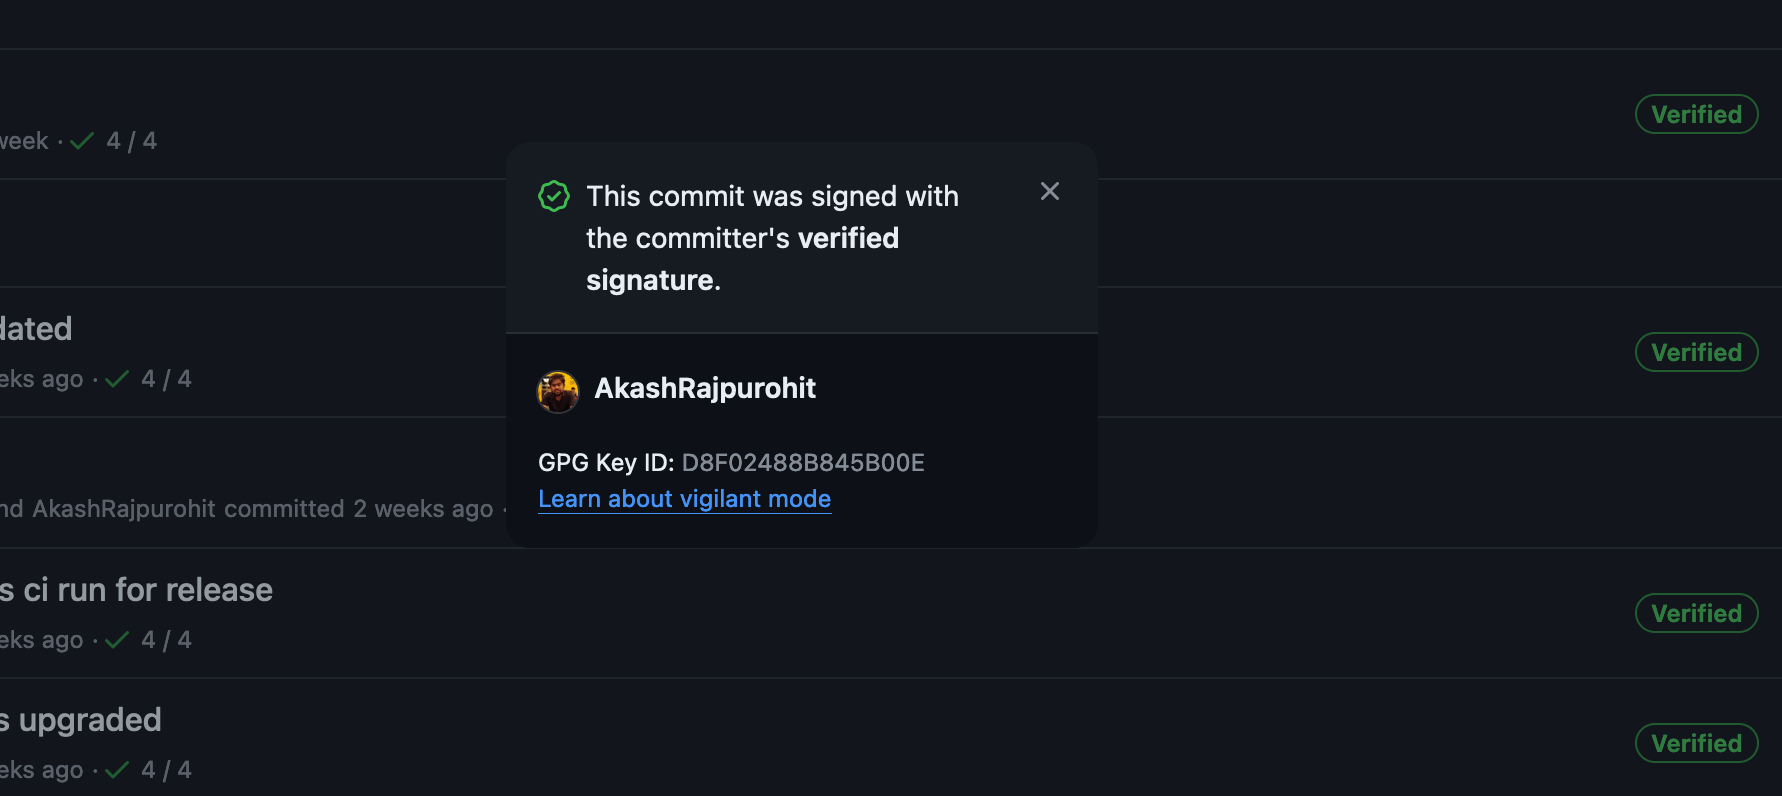
Now if someone tries to impersonate me and make a commit, you can easily verify if the commit was made by me or not based on the GPG signature.
Death is hard enough. Accessing accounts shouldn't be.

When someone passes away, their family is often locked out of the accounts, documents, and details they were meant to have. Eternal Vault is my fix for that: a secure place to store what matters and hand it to the right people when it's needed.
How to create GPG keys?
GPG as a tool is by default available on most Linux distributions. You can install it using your package manager. For example, on Debian, you can install GPG (specifically version 2) using the following command:
sudo apt-get install gnupg2I have aliases gpg to gpg2 in my shell so I can use gpg instead of gpg2. But feel free to use gpg2 if you want to be explicit.
Once you have installed GPG, we can generate key with ED25519 algorithm which is considered to be more secure than RSA. You can generate a new GPG key using the following command:
gpg --full-generate-key --expertThis will ask you which key do you want to create, use the option 9 which is ECC sign and encrypt.
Please select what kind of key you want: (1) RSA and RSA (2) DSA and Elgamal (3) DSA (sign only) (4) RSA (sign only) (9) ECC (sign and encrypt) *default* (10) ECC (sign only) (14) Existing key from cardYour selection? 9Once you select this, it will ask you to choose the elliptical curve. Choose the option 1 which is ED25519.
Please select which elliptic curve you want: (1) Curve 25519 *default* (4) NIST P-384 (6) Brainpool P-256Your selection? 1After this, it will ask for the validity of the key, now this depends for you, you can either opt for never expire or you can set the expiry date for the key. Choose the option which suits you. The default value is “0” which means the key will never expire.
Please specify how long the key should be valid. 0 = key does not expire <n> = key expires in n days <n>w = key expires in n weeks <n>m = key expires in n months <n>y = key expires in n yearsKey is valid for? (0)Now we have decided what type of the key we want, so next steps are to enter your name, email address and a comment. The comment is optional, you can leave it empty. This will help you to identify the key in the future.
GnuPG needs to construct a user ID to identify your key.
Real name: Your NameEmail address: [email protected]Comment: My GPG KeyYou selected this USER-ID:    "Your Name (My GPG Key) <[email protected]>"
Change (N)ame, (C)omment, (E)mail or (O)kay/(Q)uit? O
Once you verify and proceed with the key generation, it will ask you to enter a passphrase. This passphrase will be used to unlock your private key. Make sure you remember this passphrase and save it somewhere safe.
Once your keys are generated, you can list them using the following command:
gpg --list-secret-keys --keyid-format LONGThis will list all the keys you have on your system. You can see the key ID of the key you just generated. Once the key is generated, let’s trust the key and mark it as ultimate trust. We will do this by using the following command:
Replace [email protected] with the actual email address that you used to generate the key. This will open the GPG key editor where a prompt would be available, type trust and press enter. This will ask you to select the trust level, choose the option 5 which is ultimate trust.
gpg> trustsec  ed25519/G8F0B5B0488V820F     created: 2023-10-30  expires: never       usage: SC     trust: ultimate      validity: ultimatessb  cv25519/F4B8A4AACE6C7CB7     created: 2023-10-30  expires: never       usage: E[ultimate] (1). Your Name (My GPG Key) <[email protected]>
Please decide how far you trust this user to correctly verify other users' keys(by looking at passports, checking fingerprints from different sources, etc.)
  1 = I don't know or won't say  2 = I do NOT trust  3 = I trust marginally  4 = I trust fully  5 = I trust ultimately  m = back to the main menu
Your decision? 5Do you really want to set this key to ultimate trust? (y/N) y
Once this is done, type quit to exit out of the GPG prompt. Now try the listing your keys again with:
gpg --list-secret-keys --keyid-format LONGYou will see the trust level of the key is now ultimate.
How to use GPG with Git?
Now that we have generated the GPG key, let’s configure git to use this key to sign the commits. You can do this by setting the user.signingkey configuration in git. You can set this configuration using the following command:
git config --global user.signingkey G8F0B5B0488V820FUse the key ID that you generated in the previous step. Once this is done, you can sign your commits using the -S flag with the git commit command. For example:
git commit -S -m "My signed commit"This will sign the commit with your GPG key. You can verify the signature of the commit using the git verify-commit command. For example:
git verify-commit HEADThis will show you the details of the commit and the GPG signature. You can also see the GPG signature in the commit message when you view the commit history. For example:
git log --show-signatureWith this you should be able to see the GPG signature in the commit history. This will help you to verify the authenticity of the commits in your git repository.
Conclusion
GPG is a powerful tool that allows you to encrypt and sign your data and communications. It is widely used to secure email communication, software packages, and other sensitive data. I talked a bit about GPG and then showed how you can create a new GPG key with ED25519 algorithm, trust the key and mark it as ultimate trust. I also showed how you can use GPG with git to sign your commits.
In the next blog, I will share with you about how I use GPG in my daily workflows, so keep an eye for that if you are interested to learn more about GPG and its use cases.
As always, If you have any questions or suggestions, feel free to reach out to me on Twitter ↗️ / Reddit ↗️.
See you in the next one. 👋