Introduction
Let’s face it; online ads can be a major buzzkill. They clutter your favorite websites, slow down your page loads, and worst of all, they’re just plain annoying.
But what if I told you that you could erase ads on the go? That’s right, no more pesky ads on your phone, tablet, or laptop. All you need is a Raspberry Pi (or any device in your homelab), AdGuard Home, and Tailscale.
In this blog, I’ll show you how to set up AdGuard Home and Tailscale to block ads on your phone, tablet, and laptop. It’s a technical adventure that’s worth every click.
AdGuard Home: Your Ad-Blocking Sentry
Before we dive into the technical wizardry of AdGuard Home, let’s start with the basics. AdGuard Home is a network-wide ad and tracker blocker. It operates at the DNS level, which means it intercepts and filters out those pesky ads before they even reach your device. Think of it as your personal guard, fending off ads and trackers like a digital knight in shining armor.
But what’s even cooler is that AdGuard Home is not limited to just one device; it can cover your entire network. That means every device connected to your home network, from your laptop to your smartphone, can enjoy ad-free browsing.
I have a detailed guide explaining in much more detail and how I set it up for my homelab, you can read more about it at AdGuard Home — Network Wide Ad Blocking in your Homelab.
For quickstart, we can use the below command to install AdGuard Home on our Raspberry Pi.
curl -s -S -L https://raw.githubusercontent.com/AdguardTeam/AdGuardHome/master/scripts/install.sh | sh -s -- -vOnce you’ve installed AdGuard Home, you can access the web interface by visiting http://<ip-address>:3000 in your browser. You’ll be greeted with a setup wizard that will guide you through the process of setting up AdGuard Home.
Tailscale: The Magic of Secure Networking
Next on our list is Tailscale ↗️. It’s a fantastic tool that creates secure, private networks with ease. Whether you’re at home, in a coffee shop, or halfway across the world, Tailscale keeps your devices connected as if they were on the same local network.
Tailscale is a great fit for our ad-blocking adventure because it allows you to access your AdGuard Home instance securely from anywhere. This means you can block ads even when you’re away from your home network. Pretty cool, right?
To get started, create a Tailscale account ↗️ and we’ll install Tailscale on our devices.
Setting Up Tailscale
In my setup, I am using a Raspberry Pi Zero 2W which is running 64 bit debian in headless mode. I have also installed AdGuard Home on the same Raspberry Pi.
So I am following the linux installation setup for Tailscale. To do this, we’ll use the following command:
curl -fsSL https://tailscale.com/install.sh | shOnce Tailscale is installed, we’ll need to authenticate our Raspberry Pi with Tailscale. To do this, we’ll use the following command:
sudo tailscale up --accept-dns=falseDon’t forget to add the
--accept-dns=falseflag. This will ensure that Tailscale doesn’t interfere with AdGuard Home’s DNS server.
Next, we’ll install tailscale on client devices. You can install the Android ↗️ or iOS ↗️ app. For desktop, you can download the macOS ↗️ or Windows ↗️ client.
Once you’ve installed Tailscale on your client devices, you’ll need to authenticate them with Tailscale. To do this, you’ll need to log in to your Tailscale account and authorize your devices.
Connecting to AdGuard Home
Now that we’ve installed Tailscale on our devices, we can connect to our AdGuard Home instance. For this we will edit the DNS settings for our Tailscale network.
Head to the DNS tab ↗️ and edit the “Global Nameservers” option under “Nameservers” and add the IP address of your AdGuard Home instance.
Pick your local IP address and add it to the “Global Nameservers” option. Make sure you disable the “Override DNS servers” option.
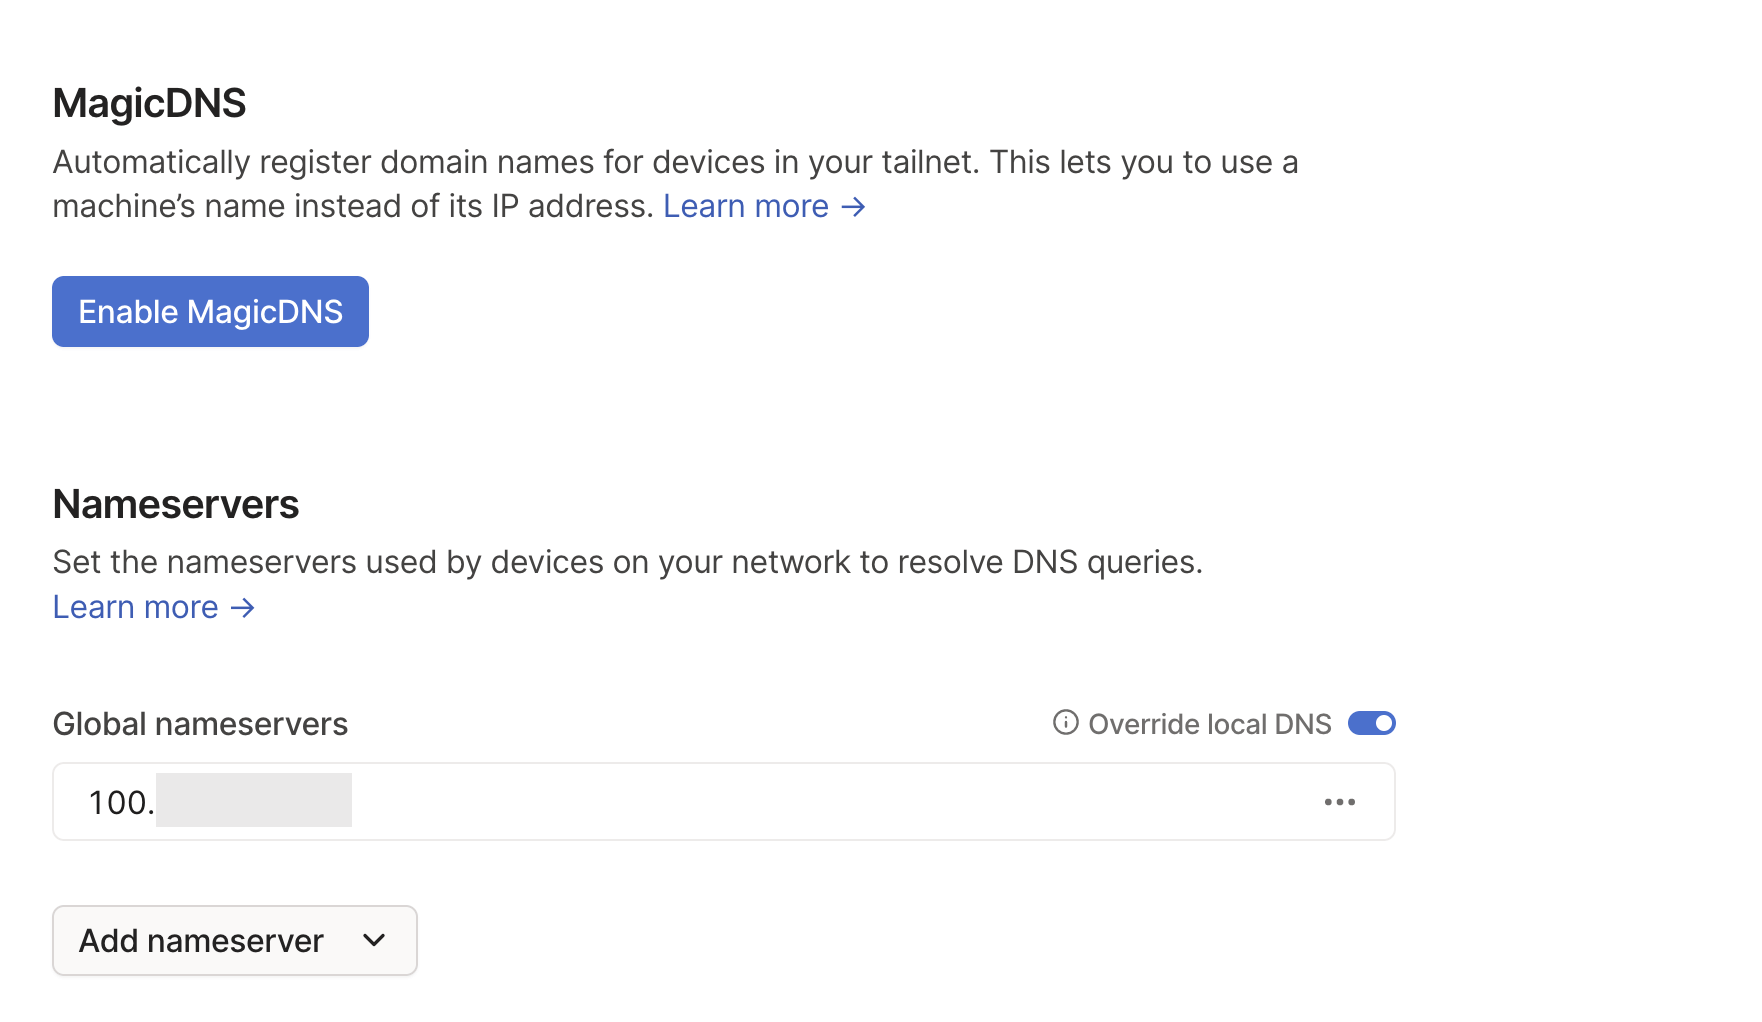
Once you’ve added the IP address of your AdGuard Home instance, you can save your changes and you’re all set!
Now when you are connected to your Tailscale network, you’ll be able to access your AdGuard Home instance. This means you can block ads even when you’re away from your home network.
The intent layer for B2B outbound

CatchIntent spots real buying signals on LinkedIn and gives you a short daily list of in-market buyers, scored and with the opener drafted. You just send.
Getting DNS Rewrites to Work
With Multiple DNS entries (Old Approach)
One thing that you might notice if you are using AdGuard Home with Tailscale is that DNS rewrites don’t work out of the box if you have the mappings set to your local internal IP address.
For example I maintain 3 servers in my homelab at the moment and they have mapping like this
| Domain | Answer |
|---|---|
| sukuna.local | 192.168.0.110 |
| suguru.local | 192.168.0.111 |
| satoru.local | 192.168.0.112 |
In this the suguru.local server is the one running AdGuard Home.
Now if want to access these servers from my laptop, I can simply type suguru.local in my browser and it will take me to the server. But if I am connected to Tailscale, this won’t work.
To fix this, we need to add the rewrites from the tailscale assigned IP addresses to the DNS mappings as well.
Consider your tailscale IP address of the AdGuard Home server is 100.100.100.100 then you need to add the following mappings as well.
| Domain | Answer |
|---|---|
| sukuna.local | 192.168.0.110 |
| suguru.local | 192.168.0.111 |
| satoru.local | 192.168.0.112 |
| suguru.local | 100.100.100.100 |
This will ensure that you can access the server from both the internal network and the tailscale network.
Since the same domain is not pointing to multiple IP addresses (local and tailscale) at the same time, you won’t run into any issues. This is because the DNS server will always return the first answer it finds for a domain.
So if you are on the local network, it will return the local IP address and if you are on the tailscale network, it will return the tailscale IP address.
However, it will perform that in round robin fashion, so you might see delayed responses when you are on the tailscale network.
Earlier I tried out a solution which worked in getting DNS rewrites to work with multiple DNS entries. However, I found the latency issue to be quite pain and it was also not full proof since it relied on DNS load balancing with round robin.
So I have been looking for a better solution and I think I have found one. Let’s understand that and how you can setup DNS rewrites to work with Tailscale.
Setup AdGuard Home Instance to Advertise Routes
If you followed along, you know we used the --accept-dns=false flag when we authenticated our Raspberry Pi with Tailscale to start it up.
Now along with that we are going to use the --advertise-routes flag.
Quick Note for Linux Users
For Linux users, before typing the tailscale command, you need to enable IP forwarding. We will add these following line in /etc/sysctl.d/99-tailscale.conf file.
Open the file in your preferred editor and add the following lines.
net.ipv4.ip_forward = 1net.ipv6.conf.all.forwarding = 1After this you need to reload the sysctl settings.
sudo sysctl -p /etc/sysctl.d/99-tailscale.confOnce the above configuration is done (in case you are using linux), you can start up the tailscale instance with the following command.
sudo tailscale up --accept-dns=false --advertise-routes=192.168.x.x/24Replace
192.168.x.x/24with your local network CIDR. For example, for my network I am using192.168.0.0/24.If you have multiple subnets then you can add them as comma separated values.
I would highly suggest to read more about subnets in the official documentation ↗️ to understand how it works since I won’t be covering that in this blog.
Once you have advertised the routes, you have to go to the Tailscale admin panel and edit the settings for the device which is running AdGuard Home.
Click on the Edit route settings button and then you can allow this device to advertise routes that you mentioned above.
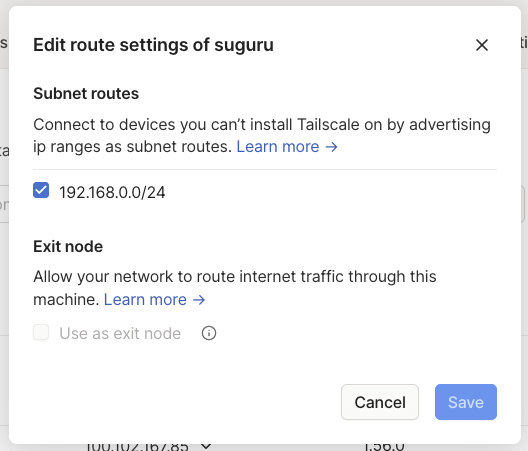
Now with the instance advertising routes, and with the DNS settings configured as mentioned above in the Tailscale DNS settings, we can now access the AdGuard Home instance from the tailscale network.
Testing DNS Rewrites
If you are using any non linux client, you can simply test this by enabling tailscale network and try accessing some service using your local DNS mappings.
For example I connected my Android device with the tailscale network and tried accessing adguard.suguru.local and it worked. 🎉
That’s it, we have solved this problem in a much better and cleaner way. Did this work for you? Or did you face any issues? Let me know by reaching out to me on any of my social handles.
If you see an issue where your DNS stops working when you connect to Tailscale from any of your clients, one possible way to fix it is to disable the “Use Tailscale DNS” option in the DNS settings for the device.
However that means that you will not be using your AdGuard Home instance for DNS queries (which defeats the purpose of using AdGuard Home in the first place). So if you are running into this issue, you can try the following workaround in the section below.
Setup Exit Nodes
So far we have our AdGuard Home instance running and we have configured tailscale to use our AdGuard Home instance for DNS queries, this is great. But we can take it a step further and use Tailscale as an exit node for our AdGuard Home instance.
This way not only we can block ads on the go, but also make our instance more secure and private, essentially making it a VPN.
To do this, we need to setup Tailscale as an exit node on our instance. So let’s do that.
Similar to the previous sections where we used --advertise-routes flag, we will now tack on --exit-node flag.
sudo tailscale up --accept-dns=false --advertise-routes=192.168.x.x/24 --advertise-exit-nodeIf you already have a tailscale instance running, you can add the exit node by running the following command.
sudo tailscale set --advertise-exit-nodesudo tailscale upOnce done, you need to head over to the Tailscale admin panel and edit the settings for the device which is running AdGuard Home.
Click on the Edit route settings button and then you can allow this device to advertise routes that you mentioned above and allow it to be used as an exit node.
Now to test this, you can simply connect to your tailscale network from any other client and enable to use this instance as an exit node. This will ensure that all your traffic is routed through your AdGuard Home instance.
Setup Exit Node to use AdGuard Home for DNS queries
There is a known issue due to which you might run into a scenario where if you are using a device as exit node and have “Use Tailscale DNS” option enabled, your internet will stop working i.e the underlying issue is that the DNS queries are not getting resolved at all.
The simple fix mentioned above works and restores your internet connectivity, but in this section we will see how we can setup Tailscale as an exit node to use AdGuard Home for DNS queries.
The idea is that we need to explicitly tell the device that “this is DNS server you want to use for DNS queries” i.e point all the DNS queries to this server (which is the server running AdGuard Home). For me its the same device which is running AdGuard Home and Tailscale.
So first step is to update the /etc/systemd/resolved.conf file to point to the AdGuard Home instance.
sudo vi /etc/systemd/resolved.confAnd add the following line to the file.
[Resolve]DNSStubListener=noDNS=127.0.0.1FallbackDNS=1.1.1.1Before we restart the service, we need to run these commands as well:
sudo rm /etc/resolv.confsudo ln -sf /run/systemd/resolve/resolv.conf /etc/resolv.confNow we need to restart the systemd-resolved service to apply the changes.
sudo systemctl restart systemd-resolvedNow if you check the /etc/resolv.conf file, you will see that it is pointing to the AdGuard Home instance. And now you can enable back the “Use Tailscale DNS” option in the DNS settings for the device and use the device as an exit node and your DNS queries will be resolved through your AdGuard Home instance and everything will work as expected.
Where is this helpful?
Since its essentially your own VPN setup, which means you can access your services securely from any part of the world. This is game changer if you are someone who travels a lot (and if you don’t) and you connect to public Wi-Fi or any other insecure networks and want to make sure your traffic is secure.
With this setup, not only you are blocking ads on the go, but also making sure your traffic is secure and private which is a big win.
Conclusion
Thanks to AdGuard Home and Tailscale, you can say goodbye to annoying ads no matter where you are. It’s a powerful combo that not only keeps your home network ad-free but extends that bliss to your devices on the move.
It was good learning experience for me as well while trying to find a solution for this. I hope you enjoyed this blog and found it helpful. If you have any questions or comments, please feel free to reach out to me on Twitter ↗️. I’d love to hear from you!
Until next time, happy hacking!