Introduction
In our ongoing self-hosting journey, monitoring is often one of the most critical yet overlooked aspects of running a homelab. You need to know when your services are down, when resources are running low, or when something unusual is happening on your servers.
While there are many monitoring solutions available like Prometheus, Grafana, Netdata, or Uptime Kuma, most of them can be resource-intensive or complex to set up. I wanted something lightweight, simple, and effective that wouldn’t consume significant resources on my homelab servers.
That’s when I discovered Beszel ↗️, and it has completely changed how I monitor my infrastructure. What makes it truly special is its minimal footprint - a single Go binary for agents and Docker-based hub that just works.


What is Beszel?
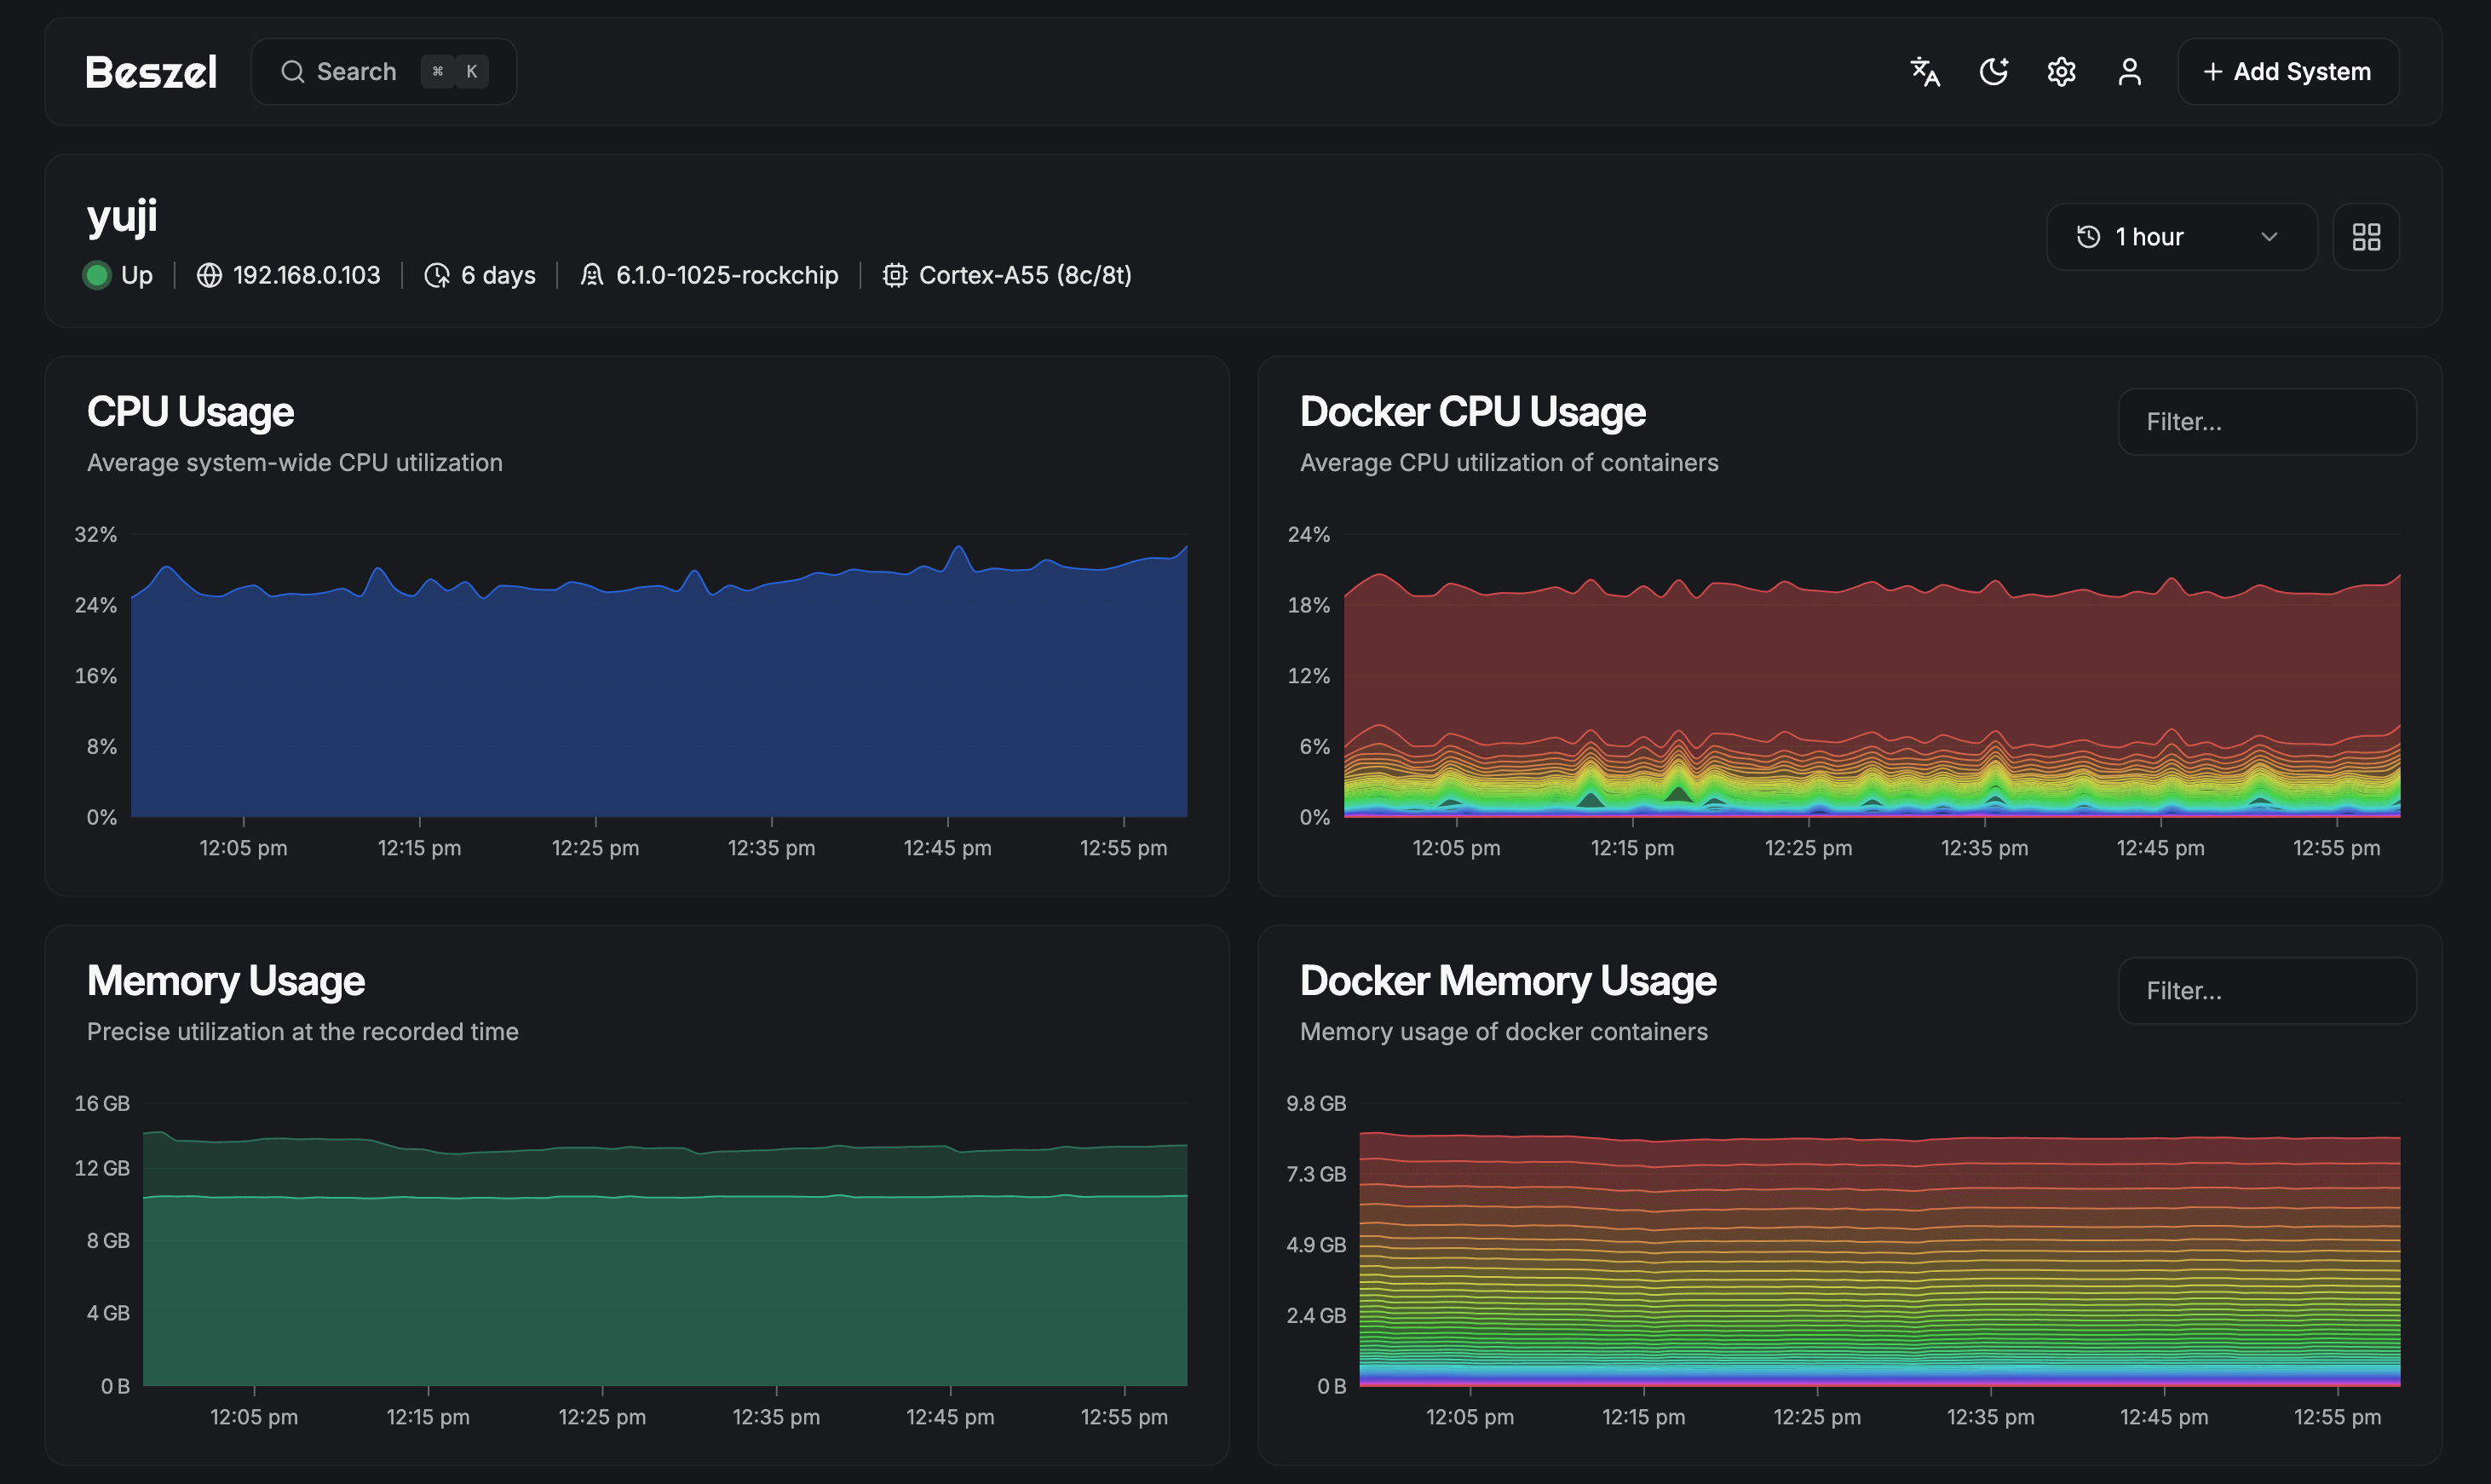
Beszel ↗️ is a lightweight server monitoring platform that provides real-time and historical data about your systems. It’s designed with simplicity and efficiency in mind, making it perfect for homelab environments where resources matter.
What really impressed me about Beszel was its feature set:
- Docker/Podman container statistics - Monitor all your containers
- Historical data tracking - View metrics over time
- Configurable alerts - Get notified about CPU, memory, disk, bandwidth, temperature, and system status
- Multi-user support - Admin system for sharing access
- OAuth/OIDC authentication - Secure login options
- Automatic backups - Save data to disk or S3-compatible storage
- REST API - Integrate with custom scripts
- Minimal resource usage - Lightweight single Go binary for agents
- No public internet exposure required - Perfect for private homelabs
The best part? It’s completely open-source (MIT License) and actively maintained.
Why Beszel Over Other Monitoring Solutions?
Having tried various monitoring solutions in my homelab, here’s what makes Beszel stand out:
-
Incredibly Lightweight: The agent is a single Go binary with minimal memory footprint - perfect for resource-constrained systems.
-
Simple Deployment: Hub runs in Docker, agents can be deployed with a single command that sets up everything including the systemd service.
-
Docker-First Monitoring: Built-in support for monitoring Docker containers without additional configuration.
-
No Complexity Overhead: Unlike Prometheus+Grafana stacks, Beszel gives you everything in one simple package.
-
Private by Default: Doesn’t require exposing your systems to the internet, making it ideal for homelab environments.
-
Beautiful Interface: Clean, modern web UI that’s easy to navigate and understand at a glance.
Setup Beszel in Your Homelab
One of the things I love about Beszel is how straightforward the setup process is. You deploy a hub (the central monitoring server) and agents on each system you want to monitor.
Prerequisites
Before we begin, ensure you have:
- A server for the hub with Docker and Docker Compose installed
- Systems you want to monitor (can be the same server as the hub)
- Basic understanding of systemd services (for agent deployment)
Hub Deployment with Docker
I prefer running the hub in Docker as it’s the easiest method and keeps everything containerized. Create a directory for Beszel and add a docker-compose.yml file:
services: beszel: image: henrygd/beszel:latest container_name: beszel restart: unless-stopped ports: - '8090:8090' volumes: - ./beszel_data:/beszel_data environment: - TZ=Asia/KolkataStart the hub:
docker compose up -dThe web interface will be available at http://your-server-ip:8090.
Creating Your Admin Account
Visit http://your-server-ip:8090 and create your admin account. This will be your primary account for managing all monitored systems.
Agent Deployment - The Easy Way
This is where Beszel really shines. Instead of manually installing and configuring agents, Beszel provides an automated installation script that does everything for you.
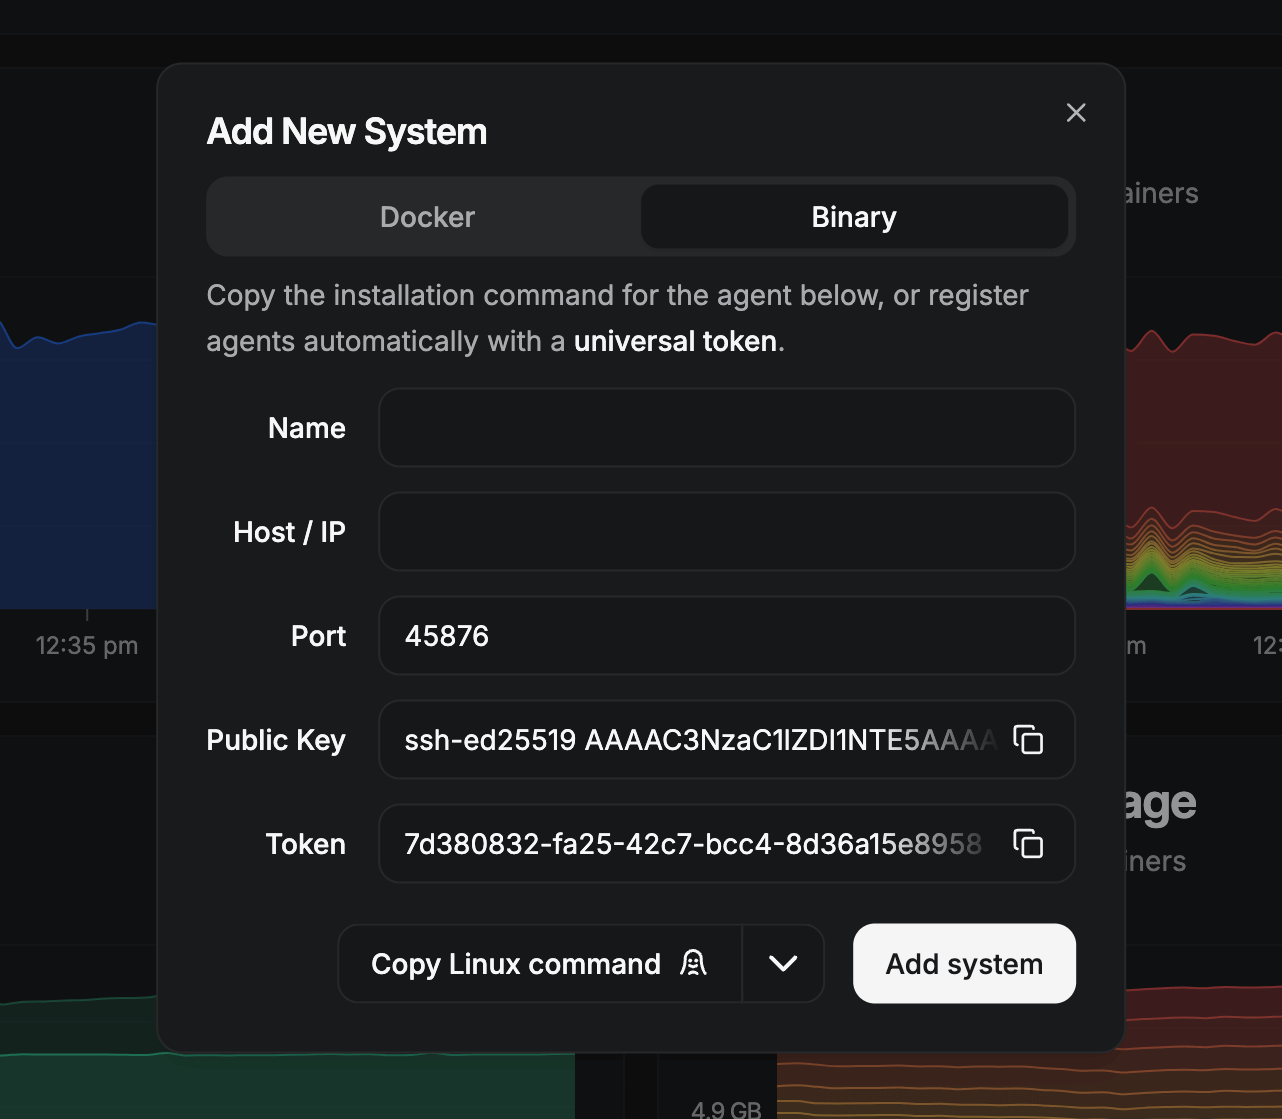
- Click “Add System” in the Beszel web interface
- You’ll see a command like this:
curl -sL https://get.beszel.dev -o /tmp/install-agent.sh && chmod +x /tmp/install-agent.sh && /tmp/install-agent.sh -p 45876 -k "ssh-ed25519 your-key" -t "your-token" -url "https://beszel.yourdomain.com"- Run this command on the system you want to monitor
That’s it! The script automatically:
- Downloads the Beszel agent binary
- Creates a systemd service
- Configures and starts the agent
- Sets it to start on boot
The agent is now running as a systemd service with minimal resource usage.
The Beszel agent typically uses less than 10MB of RAM and has negligible CPU usage. This makes it perfect for monitoring even resource-constrained systems like Raspberry Pi or older hardware.
Verifying Agent Connection
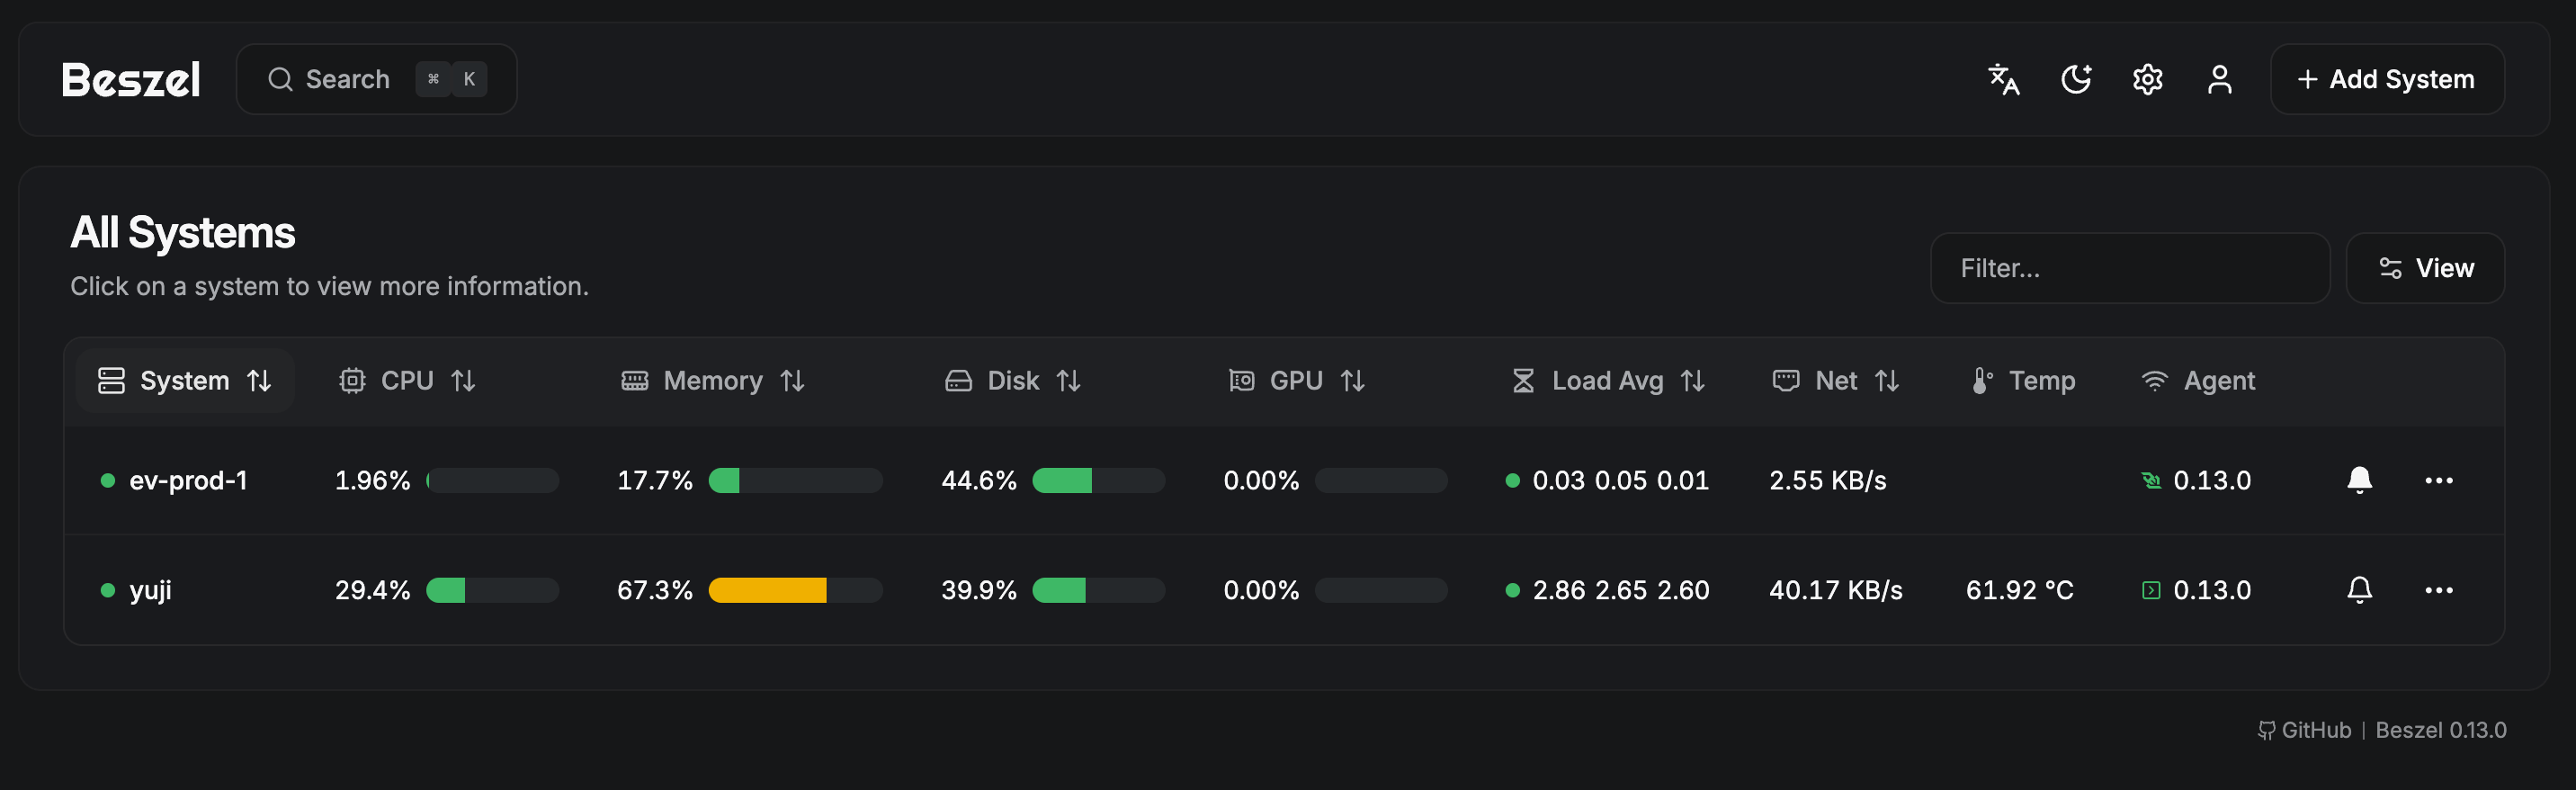
Back in the Beszel web interface, you should see your system appear with a green status indicator, showing it’s successfully connected and sending metrics.
Death is hard enough. Accessing accounts shouldn't be.

When someone passes away, their family is often locked out of the accounts, documents, and details they were meant to have. Eternal Vault is my fix for that: a secure place to store what matters and hand it to the right people when it's needed.
My Setup and Configuration
Here’s how I’ve configured Beszel in my homelab:
-
Infrastructure: Hub running on my main server in Docker, with agents deployed on:
- Main server (monitoring Docker containers)
- Orange Pi 5 Plus
- Raspberry Pi running various services
-
Reverse Proxy: Using Caddy for secure external access:
Terminal window beszel.mydomain.com {reverse_proxy localhost:8090} -
Access Control:
- Internal access via home network
- External access through Cloudflare Tunnels or Tailscale
-
Alert Configuration: Set up alerts for:
- CPU usage above 80%
- Memory usage above 85%
- Disk usage above 90%
- System offline for more than 5 minutes
-
Integration: Beszel uses Shoutrrr, so you can use any of the supported providers ↗️ to send alerts through that (like Ntfy). Since I don’t use Shoutrrr, I am directly using their
generic://protocol to send alerts to my Ntfy instance.
Features I Love
After using Beszel for several weeks, here are the standout features:
-
Single Binary Agent: No dependencies, no package managers, just one binary that does everything.
-
Automated Setup: The installation script makes deploying agents trivial - perfect when you’re managing multiple systems.
-
Docker Stats: Real-time monitoring of all containers without additional configuration.
-
Historical Graphs: Beautiful visualization of metrics over time helps identify trends and patterns.
-
Alert Flexibility: Configure exactly what you want to be notified about with custom thresholds.
-
Systemd Integration: Agents run as proper system services with automatic startup and logging.
Want help with this on your own server?
I run my apps on my own servers and I have been writing about it here for years. If you are stuck on your own setup, or you want someone to look at it with you before you trust it with real users, you can book an hour with me. I only take 4 calls a month.
Limitations and Considerations
While Beszel is excellent, there are some things to keep in mind:
-
Younger Project: It’s relatively new compared to established solutions, so the ecosystem is still growing.
-
Limited Plugins: Unlike Grafana or Netdata, there aren’t many third-party integrations yet.
-
Basic Metrics: Focuses on core system metrics - if you need specialized monitoring (database-specific, application-specific), you might need additional tools.
-
Network Requirements: Agents need to communicate with the hub, so ensure your network allows the required ports.
These are minor considerations, and for most homelab monitoring needs, Beszel is more than sufficient.
Conclusion
Beszel has become an essential part of my homelab infrastructure. The combination of minimal resource usage, simple deployment, and comprehensive monitoring makes it the perfect choice for anyone running self-hosted services.
The fact that agents are single Go binaries managed by systemd, while the hub runs in Docker, gives you the best of both worlds - simplicity and maintainability. The automated installation script eliminates the usual pain of deploying monitoring agents across multiple systems.
If you’re looking for a lightweight, effective monitoring solution for your homelab that doesn’t require a degree in DevOps to set up, Beszel is absolutely worth trying.
Have you tried Beszel or other lightweight monitoring solutions? What’s your approach to monitoring your self-hosted infrastructure? Share your experiences in the comments below, or reach out to me on Twitter ↗️ / Reddit ↗️.
Happy monitoring!