Introduction
In this article, we will learn how to set up Cloudflare Proxy if your websites or apps are hosted on Vercel or Netlify or any of the other similar services.
Most of the steps would be pretty much the same if you are hosting the website on let’s say a Digital Ocean droplet or any other VPS but in this one, I want to focus more on when you have your website hosted at some place like Vercel or Netlify or other SaaS-based cloud providers.
Skip the next section if you are looking for the set-up directly
But Why?
Before we start with the process it’s important to understand why we want to do this in the first place or rather why these cloud providers would not encourage you to add a Cloudflare proxy in the first place.
Please bear in mind that I am not stating this in any negative way, in fact, I am using Netlify and Vercel for a long time and love their service and ease of deploying apps.
But this is what I have read on many community forums it is not encouraged to add a proxy in between and they do have very solid reasoning behind it. The reason why it is not encouraged is that these individual services already have their edge infrastructure in place to provide caching of static assets and load balancing your serverless functions over the globe, its not possible for them to control the client-to-server request life cycle if there is a proxy sitting in between probably doing the same task of adding another cache layer.
If your goal is to use a Cloudflare proxy just for caching static assets so that those can reach your end users quickly then I don’t think you need the add a proxy, this use-case is very well handled by these cloud providers already.
If you want to have more control over the traffic you definitely want to add a Cloudflare proxy in between.
A Cloudflare proxy will help you introspect the traffic and apply some configurations which can help you to protect your website from malicious users and attackers.
There are a few tricky things to do to get the proxy to work happily with Vercel or Netlify. So let’s dive into it.
Prerequisite
To ensure we can start with the proxying there are few things that are required.
- You have a site added to Cloudflare so you can update the DNS records for your site.
- You have your site hosted on Vercel or Netlify which has an apex domain (root level domain) configured on Cloudflare.

Most probably for you the proxy status would be DNS Only instead of proxied.
Enjoying the content? Support my work! 💝
Your support helps me create more high-quality technical content. Check out my support page to find various ways to contribute, including affiliate links for services I personally use and recommend.
Steps of Enabling Proxy
You must’ve guessed, I just need to toggle this switch from DNS Only to Proxy.
Well yes, but we will do this in the last step, before that let’s do some required configurations so that the proxy can work happily.
Enable your SSL/TLS encryption mode to Full
You can find this under SSL/TLS -> Overview
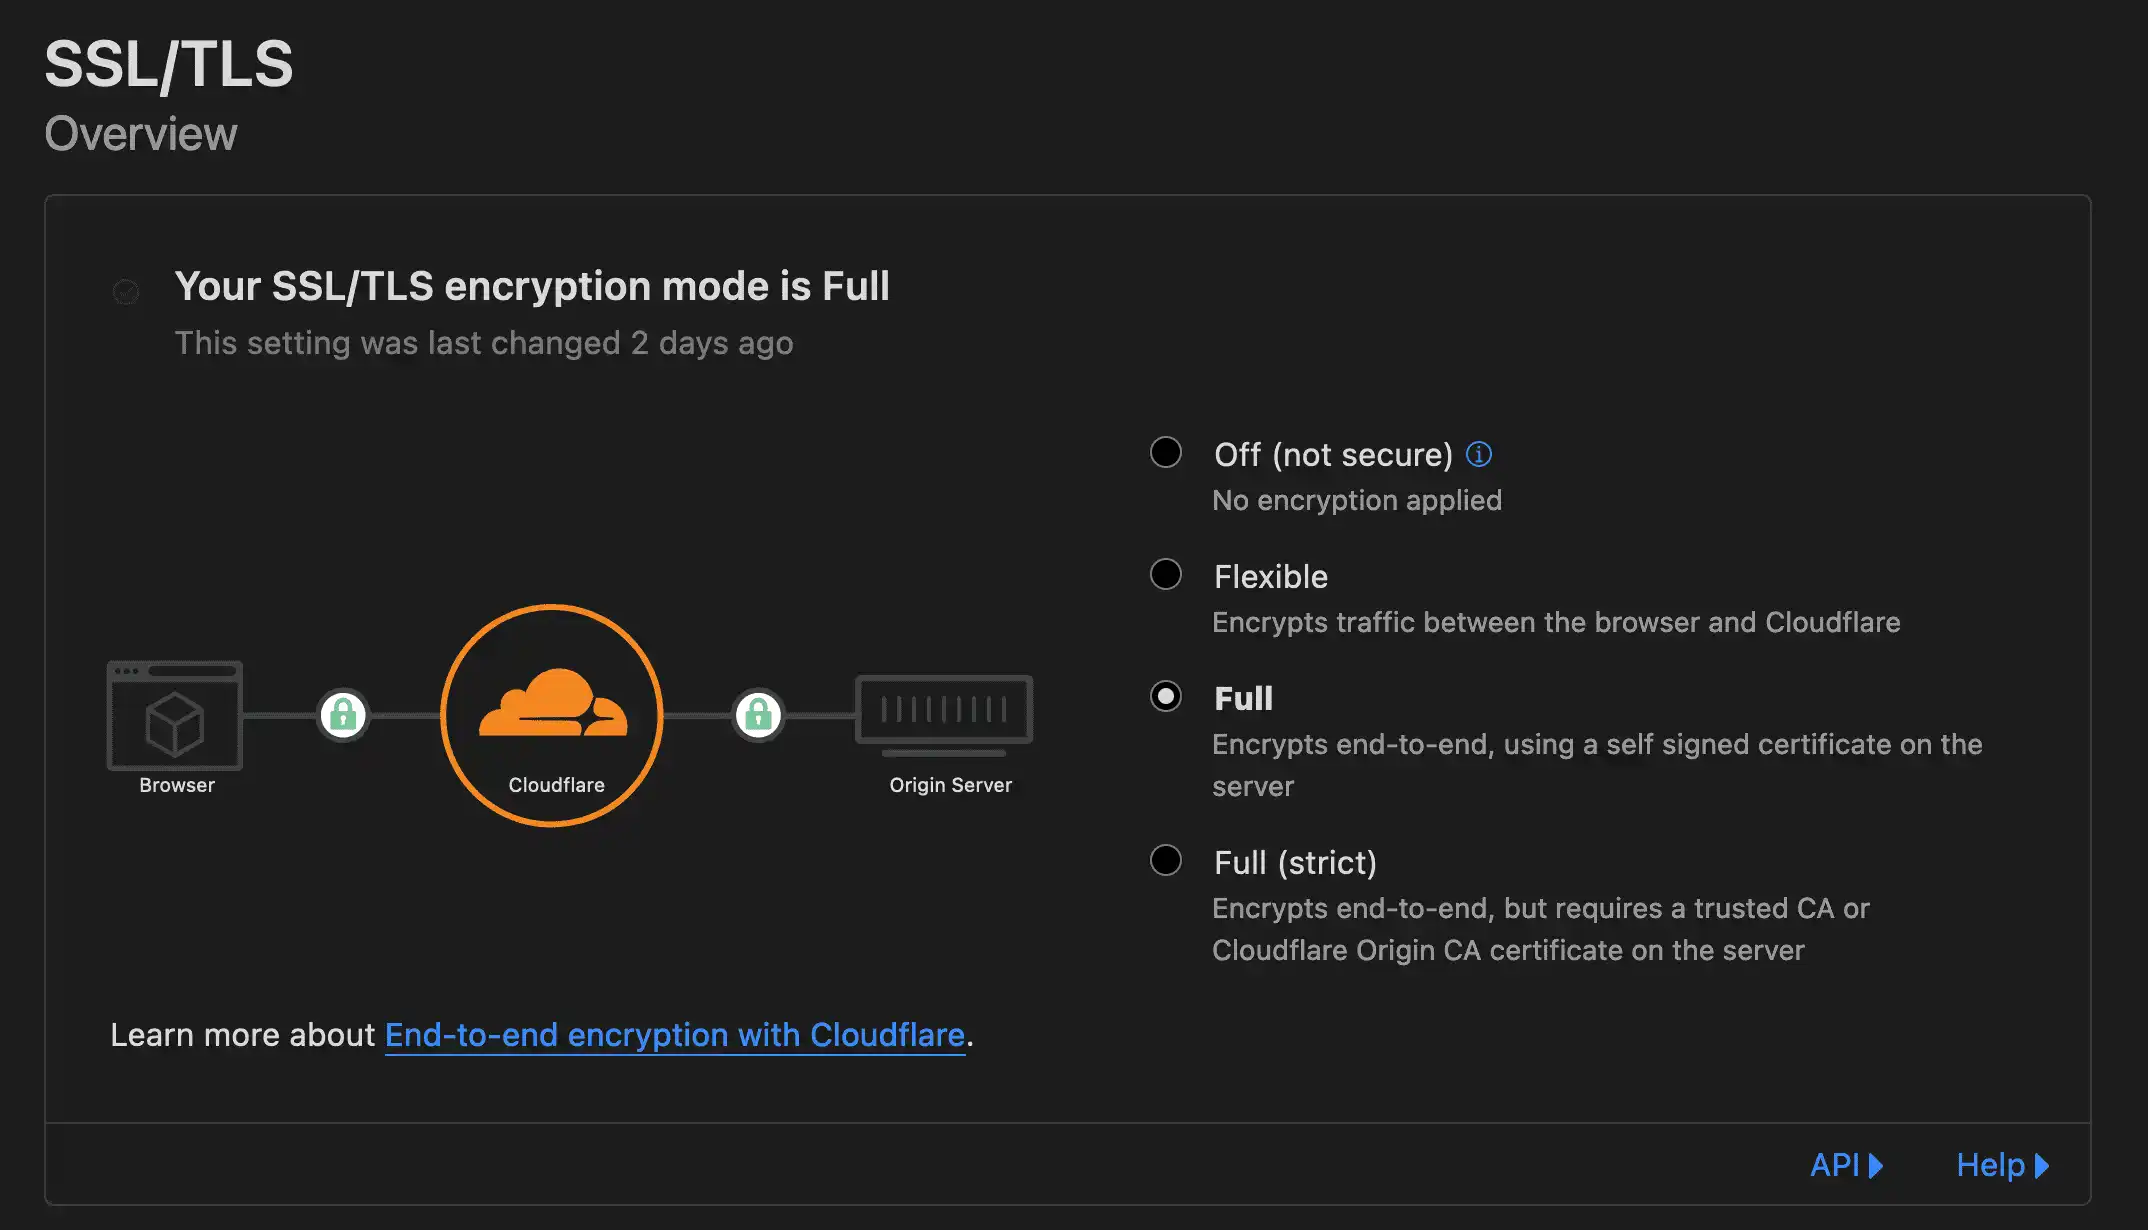
What this will do is encrypt the connection between your Cloudflare proxy and your origin server (which would be Vercel or Netlify or anything else).
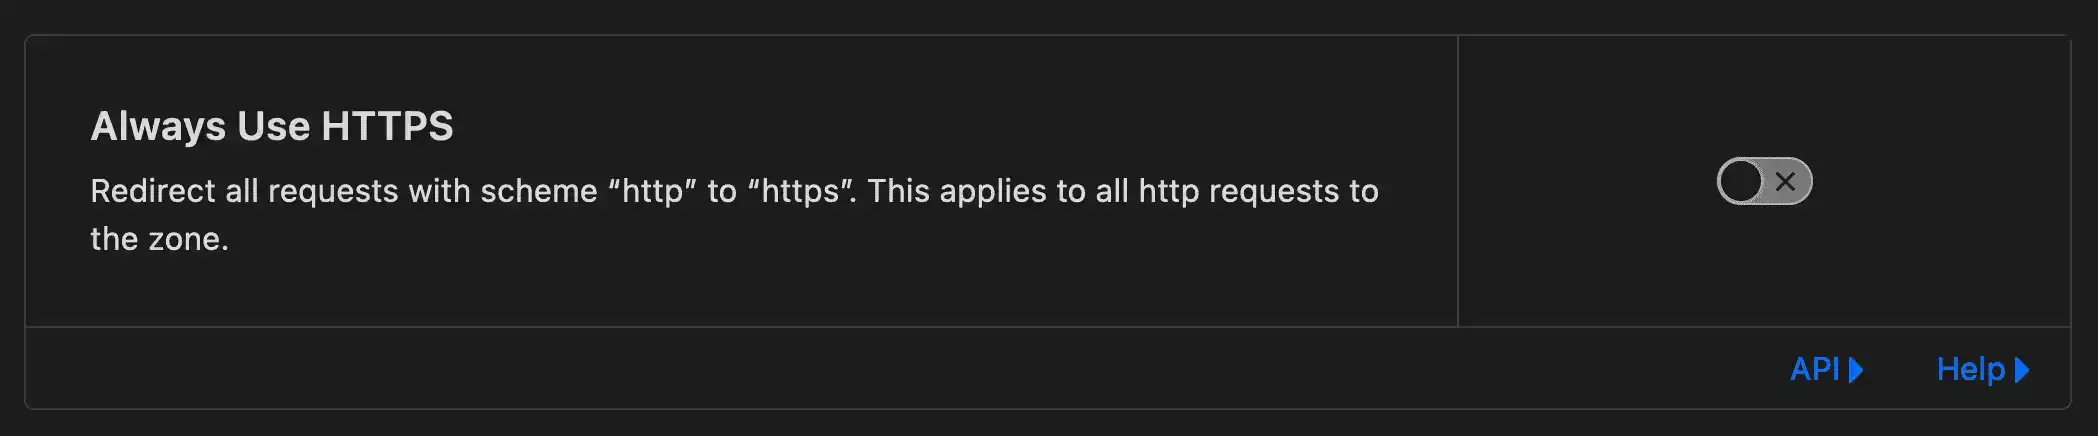
Disable Always Use HTTPS
Don’t worry, you read it correctly, I know it is advised to redirect your traffic from HTTP to HTTPS and we will do that in the next step using Page rules but the reason we want to disable it from here is that there are certain routes where we do not want to redirect from HTTP to HTTPS.
The routes where we don’t want to redirect from HTTP to HTTPS are anything under yourdomain.tld/.well-known/ directory.
This is because Vercel or Netlify uses Let’s Encrypt ↗️ for generating certificates that are valid for 3 months and are auto-renewed.
The renewal process is like this, Vercel will hit this route yourdomain.tld/.well-known/acme-challenge. If this HTTP request gets redirected to HTTPS, Let’s Encrypt will fail to issue an SSL certificate on behalf of Vercel for your domain. So essentially whenever your domain SSL certificates renewal process would be due, it would fail which means the connection between Cloudflare and Vercel would also fail.
To avoid this, we will add some page rules to make sure that our site always uses HTTPS but also does not redirect to HTTPS if a request comes in for certificate renewal.
So to disable this head to the SSL/TLS -> Edge Certificates and disable this option.
Setting up Page Rules
Head over to Rules -> Page Rules
We will add two rules here, one is to disable SSL when any request comes in at path .well-known and another one is to always use HTTPS for all other routes.
So let’s start with the first one, create a new rule and add the configuration as shown in the image below
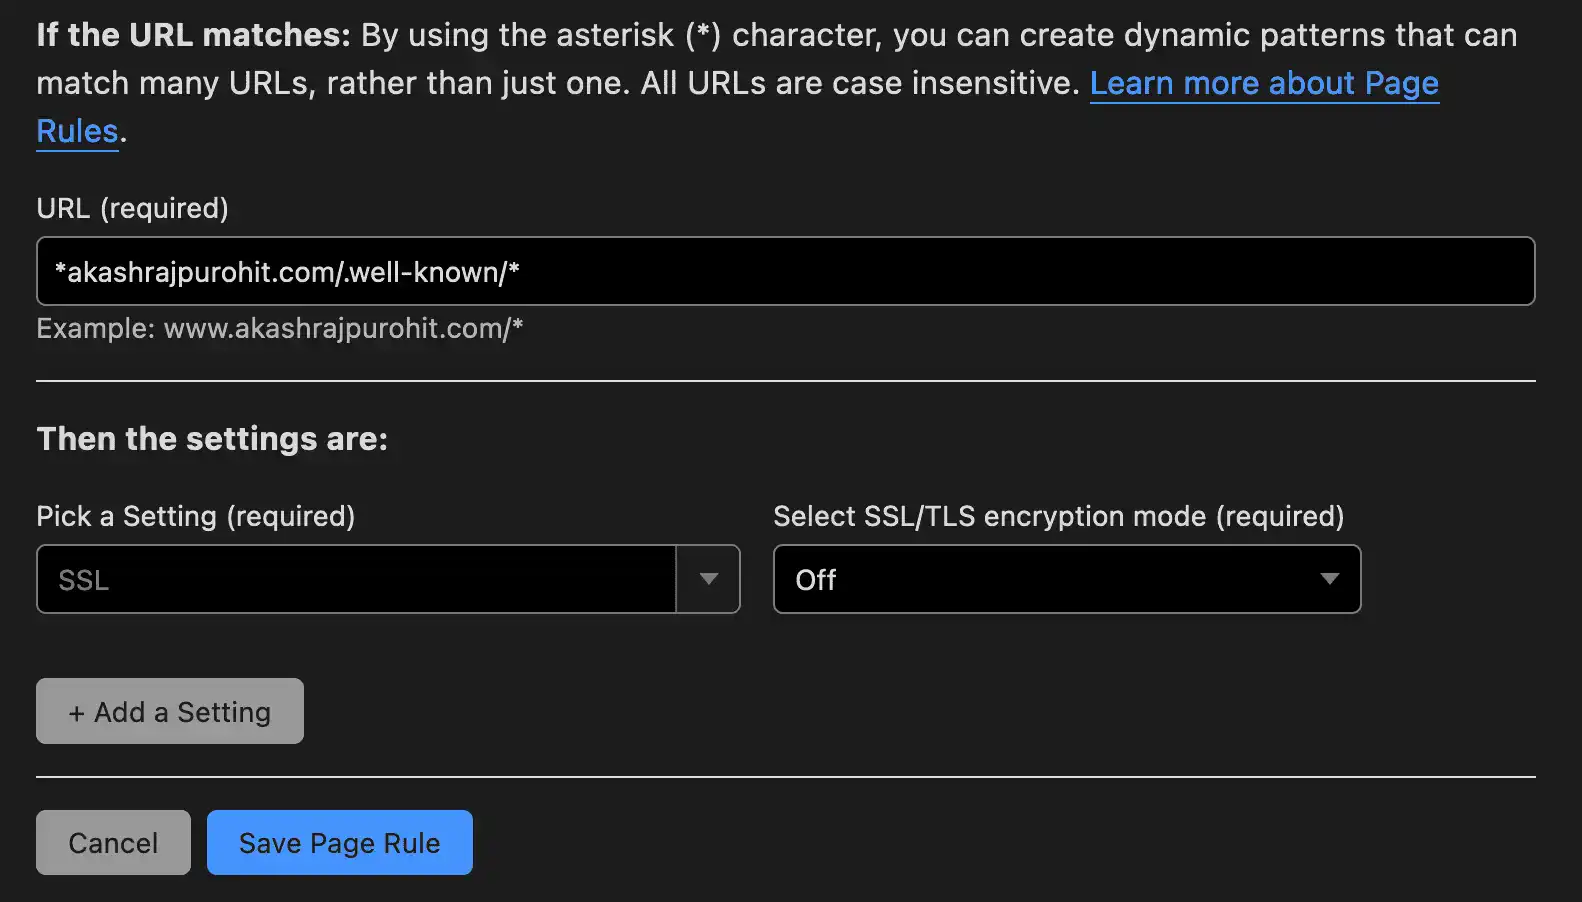
Save this rule and add another rule for always using HTTPS for all other routes.
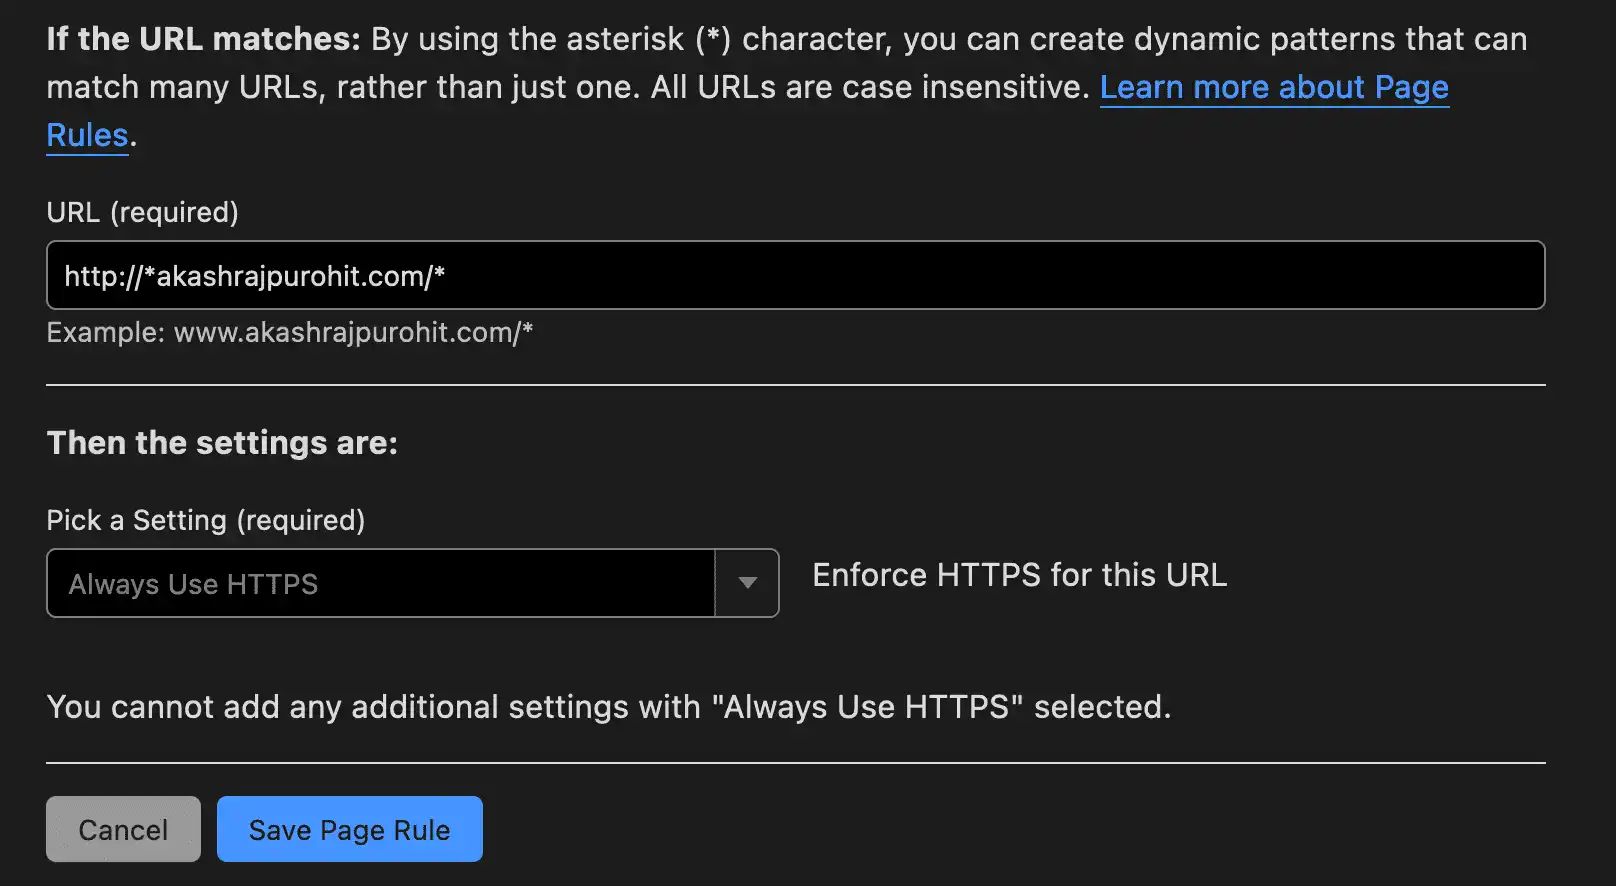
The most important detail here is the ordering of these page rules, we want to make sure that the Always use HTTPS rule stays in the last order so that our page rule for
.well-knowngets processed first and it does not get upgraded to HTTPS
So make sure your order looks something like this.

If they are not in this order then use the arrow button to align them in this order.
After this is done, we can now enable the proxy from DNS Only to Proxied in the DNS settings as we saw above.
Testing
After finishing up all the mentioned changes, its time now to test it.
To verify if we have done the configurations correctly, we would do two specific tests.
- All incoming requests to
http://yourdomain.tld/.well-known/acme-challengeshould not get redirected to HTTPS - All incoming requests to
http://yourdomain.tld/should get redirected tohttps://yourdomain.tld
So let’s test for these two scenarios, open your terminal and type the CURL command by replacing yourdomain.tld with your actual domain name.
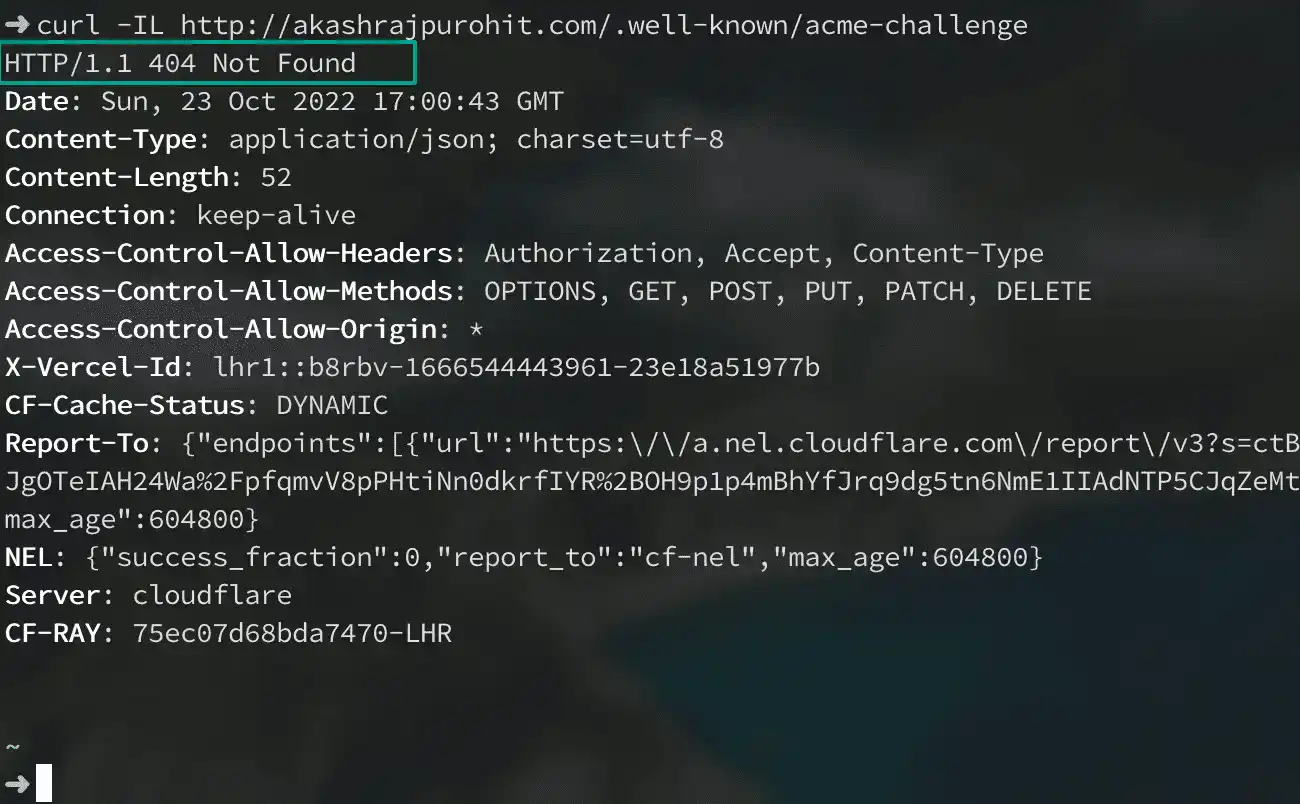
curl -IL http://yourdomain.tld/.well-known/acme-challengeIf everything went right you should see a similar output where the HTTP request is not redirected to HTTPS and returned a 404 status code since no such file exists on my server.
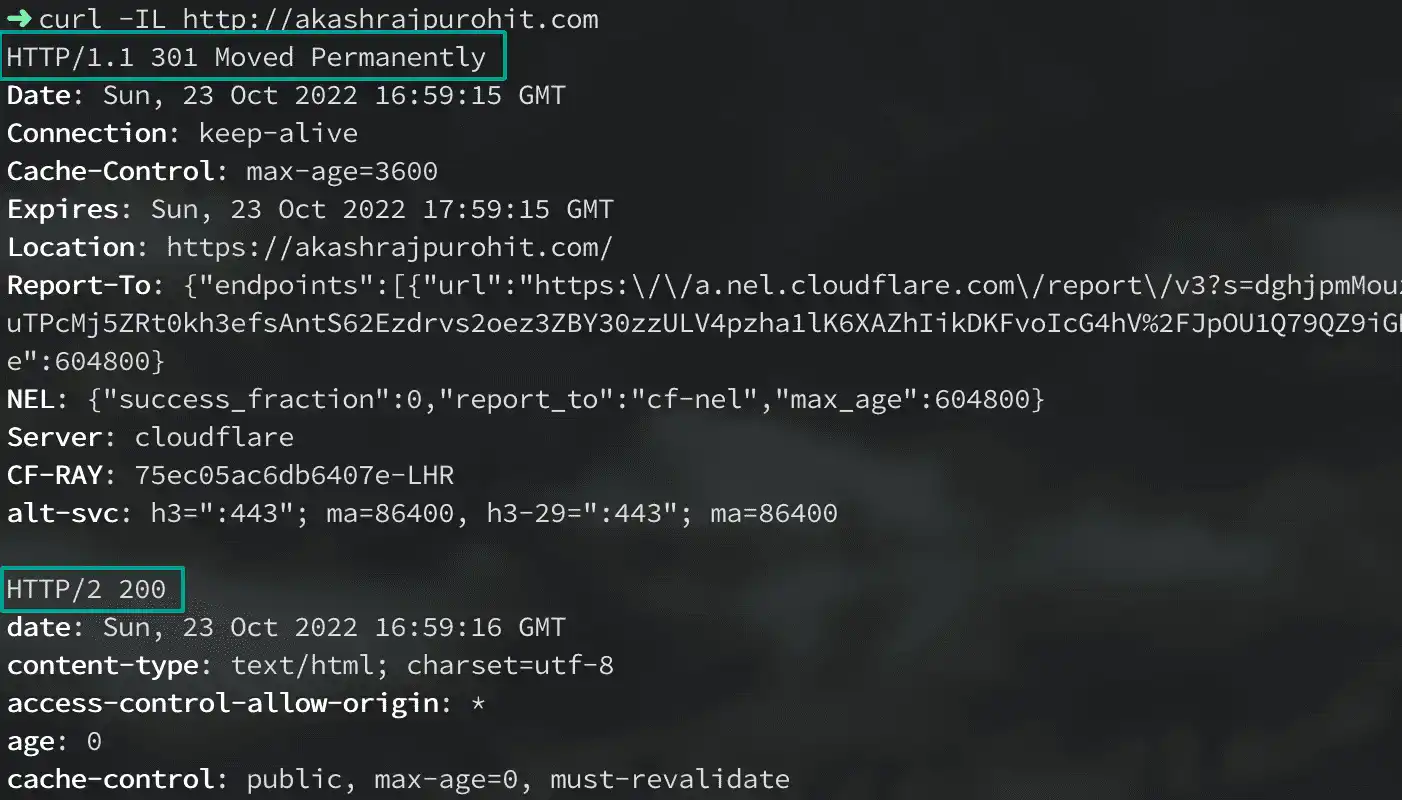
curl -IL http://yourdomain.tldAnd for this, we would see a successful redirect to HTTPS with a 301 status code.
Now you have successfully configured your Cloudflare proxy.
Hope you found this helpful, see you in the next one where we will learn how I was able to safeguard my website hosted on Vercel using Cloudflare 🚀 👋🏽