Introduction
Welcome to another week of self-hosting various services in my homelab. This week, we’re diving into web analytics - specifically, finding a privacy-focused alternative to Google Analytics that doesn’t compromise on features or user experience.
I’ve been using Umami for my analytics needs, and while it served its purpose, I started hitting some frustrating limitations. Development felt sluggish, critical features like ClickHouse support were gated behind their cloud offering, and even crucial bug fixes took forever to reach the open-source version. It was time to explore alternatives.
That’s when I discovered Rybbit, and it has completely changed my perspective on what self-hosted analytics can be. What sets it apart isn’t just its privacy-first approach, but how it delivers a genuinely intuitive user experience while providing powerful analytics capabilities.
What is Rybbit?
Rybbit ↗️ is an open-source, privacy-friendly web analytics platform designed as a modern alternative to Google Analytics. Built with performance and user privacy at its core, Rybbit aims to provide comprehensive analytics without the invasive tracking methods used by traditional platforms.
What really drew me to Rybbit was its impressive feature set:
- Cookieless tracking - GDPR and CCPA compliant by design
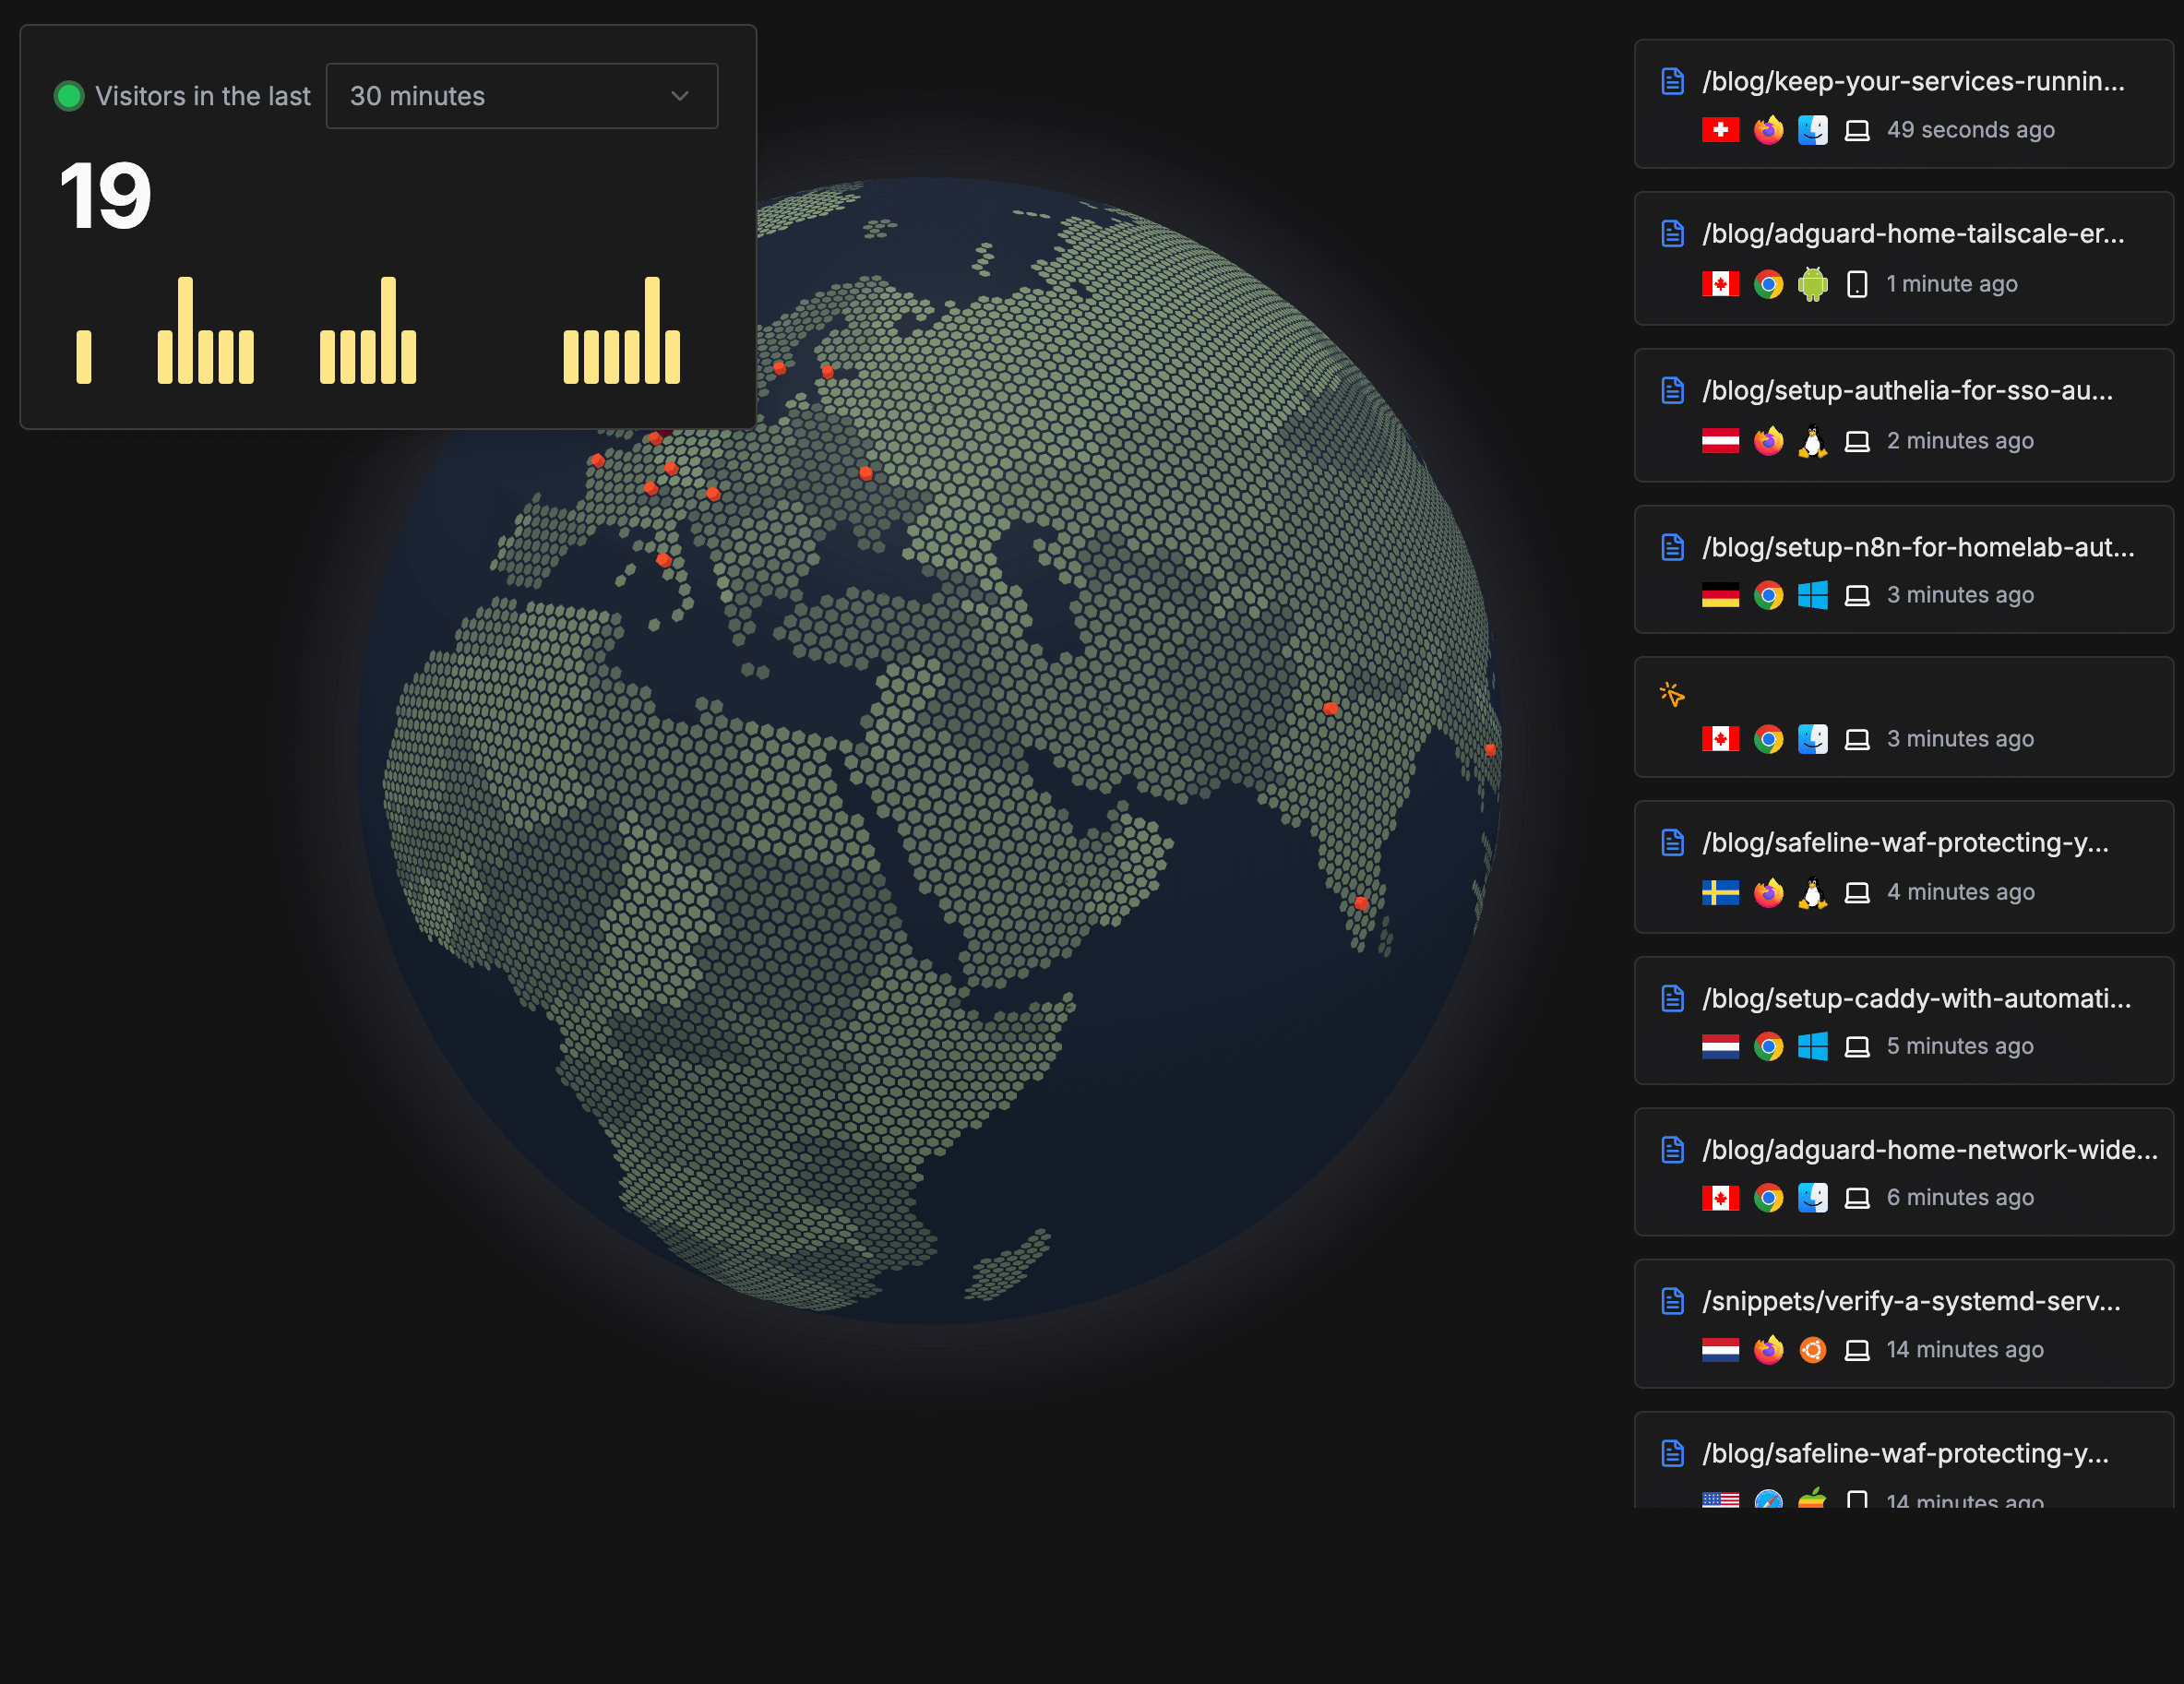
- Real-time analytics - Live dashboard with instant insights
- Session replay - Watch user interactions to understand behavior
- Web vitals monitoring - Core performance metrics
- User journey tracking - Complete visitor flow analysis
- Advanced filtering - 15+ dimensions for detailed analysis
- Custom goals and funnels - Track specific user actions
- Zero data sharing - Your data stays completely private
- Lightweight tracking script - Minimal impact on page performance
And the best part? It’s completely open-source under the AGPL 3.0 license, with an active development community and regular updates.
Rybbit is actively developed and maintained, with regular updates and new features being added. The project has gained significant traction with over 8,000+ stars on GitHub and a growing community of users.
Check out their GitHub repository ↗️ to see the latest developments and roadmap.
Why I Made the Switch from Umami
While Umami served me well initially, several pain points pushed me to look for alternatives:
-
Slow Development Cycle: Critical features and bug fixes took months to reach the open-source version.
-
Feature Gating: Advanced features like ClickHouse support were exclusively available in their cloud offering, limiting self-hosted capabilities.
-
Limited Real-time Insights: The dashboard felt static compared to what modern analytics platforms offer.
-
Session Replay Absence: Understanding user behavior required additional tools or services.
Rybbit addresses all these issues with a more modern architecture, active development, and feature parity between self-hosted and cloud versions.
Setup Rybbit in Your Homelab
The beauty of Rybbit lies in its flexible deployment options. You can choose between their automated setup script for simplicity or manual Docker Compose configuration for more control.
Prerequisites
Before we begin, ensure you have:
- A server with at least 2GB RAM (I recommend Hetzner ↗️’s CAX11 ARM64 for $3.29-3.99/month)
- Docker and Docker Compose installed
- A domain or subdomain pointed to your server’s IP address
- Basic understanding of Docker and environment variables
Quick Setup with Script
The fastest way to get Rybbit running is using their automated setup script:
# Clone the repositorygit clone https://github.com/rybbit-io/rybbit.gitcd rybbit
# Run the setup script with your domain./setup.sh yourdomain.com
The script will:
- Generate secure environment variables
- Create the necessary
.envfile - Build and start all containers using Docker Compose
- Set up Caddy for automatic SSL certificates
Manual Docker Compose Setup
For more control over the deployment, you can manually configure Rybbit (this is what I did):
# Clone and navigate to the repositorygit clone https://github.com/rybbit-io/rybbit.gitcd rybbit
# Create your environment filecp .env.example .env
Edit the .env file with your configuration:
# Required settingsDOMAIN_NAME=analytics.yourdomain.comBASE_URL=https://analytics.yourdomain.comBETTER_AUTH_SECRET=your-32-character-random-secret-here
# Optional settingsDISABLE_SIGNUP=false # Set to true after you have created your accountDISABLE_TELEMETRY=true
Start the services:
docker compose up -dThe default setup includes:
- Caddy: Reverse proxy with automatic HTTPS
- ClickHouse: High-performance analytics database
- PostgreSQL: Application data storage
- Backend: Node.js API server (port 3001)
- Client: Next.js frontend (port 3002)
Death is hard enough. Accessing accounts shouldn't be.

When someone passes away, their family is often locked out of the accounts, documents, and details they were meant to have. Eternal Vault is my fix for that: a secure place to store what matters and hand it to the right people when it's needed.
Advanced Setup: Separating UI and API
Here’s where Rybbit really shines for homelab enthusiasts. You can deploy the UI within your private network while only exposing the API endpoints to the internet. This approach provides excellent security while maintaining functionality.
Architecture Overview
- UI Dashboard: Keep it internal, accessible only via internal network or VPN
- API Endpoints: Expose only the tracking endpoints (
/api/track,/api/replay, etc.) to the internet - Database: Completely isolated in your homelab
Caddy Configuration
Since Rybbit recommends using Caddy, here’s my production Caddyfile configuration:
analytics.yourdomain.com {  # Enable compression  encode zstd gzip
  request_body max_size 10MB  handle /api/* {    reverse_proxy 192.168.0.103:3001  }
  # Proxy all other requests to the client service  handle {    reverse_proxy 192.168.0.103:3002  }}
Using Cloudflare Tunnels for Selective Exposure
With this setup, you can use Cloudflare Tunnels to expose only the API endpoints while keeping your dashboard private (this is what I did):
# cloudflared config.yamltunnel: your-tunnel-idcredentials-file: /path/to/credentials.json
ingress:  # Expose only API endpoints  - hostname: api-analytics.yourdomain.com    path: /api/*    service: http://localhost:3001
  - service: http_status:404
This approach ensures that your analytics dashboard remains secure within your homelab while allowing your websites to send analytics data through the exposed API endpoints.
Client Script Configuration
When using the separated API approach, you’ll need to configure your websites to use the external API endpoint for tracking. Add the following script to your website:
<script src="https://api-analytics.yourdomain.com/api/script.js" data-site-id="your-site-id" data-track-query="true" data-session-replay="true" data-track-errors="true" data-web-vitals="true" async defer></script>The data-site-id can be found in your Rybbit dashboard after creating a new website. This setup ensures that tracking data flows through your exposed API endpoints while keeping the dashboard completely internal.
My Setup and Usage
Here’s how I’ve configured Rybbit in my homelab environment:
-
Infrastructure: Running it on my homelab server.
-
Network Architecture:
- Dashboard accessible only via Tailscale or internal network
- API endpoints exposed through Cloudflare Tunnels
- All traffic encrypted end-to-end
-
Reverse Proxy: Using Caddy for automatic SSL certificates and intelligent routing between internal and external requests.
-
Monitoring: Integrated with my existing monitoring stack to track Rybbit’s performance and uptime.
-
Backup Strategy: Daily automated backups of both PostgreSQL and ClickHouse data, encrypted and stored off-site using my standard backup workflows.
ClickHouse can consume significant storage space over time, especially with session replay enabled. Monitor your disk usage and consider implementing data retention policies based on your needs.
Currently, session replay data has a default retention period of 30 days. The team is exploring options to make retention periods configurable for different types of analytics data in future releases.
Features I Love
After several weeks of using Rybbit, here are the standout features that have impressed me:
-
Session Replay: Being able to watch actual user interactions on my websites provides insights that traditional analytics simply can’t match. It’s like having a window into user behavior.
-
Real-time Dashboard: The live updates make it engaging to monitor website activity, especially during marketing campaigns or content launches.
-
Performance: Despite handling significantly more data points than Umami, Rybbit remains incredibly responsive. ClickHouse’s columnar storage really shows its strengths here.
-
Privacy-First Design: Knowing that no cookies are used and IP addresses are immediately anonymized gives me confidence in regulatory compliance.
-
Advanced Filtering: The ability to slice and dice data across 15+ dimensions makes it easy to find specific insights about user behavior.
-
Zero Configuration Tracking: The JavaScript snippet works out of the box without requiring complex setup or configuration.
What I’m particularly looking forward to is their planned support for migrating data from Umami to Rybbit, which is currently on their roadmap. Until that feature is available, I’m running both platforms in parallel while I continue exploring Rybbit’s capabilities and fine-tuning my setup.
Migration from Other Platforms
Moving from Umami (or Google Analytics) to Rybbit is straightforward:
- Script Replacement: Simply replace your existing analytics script with Rybbit’s tracking code
- Data Import: While direct migration isn’t available, you can run both systems in parallel during transition
- Dashboard Familiarization: The interface is intuitive enough that most users adapt quickly
The transition period allows you to validate data accuracy before fully committing to the new platform.
Conclusion
Rybbit has exceeded my expectations as an analytics platform. The combination of privacy-first design, powerful features, and excellent performance makes it a compelling choice for anyone serious about website analytics while respecting user privacy.
The ability to keep the dashboard within your homelab while selectively exposing API endpoints provides the perfect balance between security and functionality. It’s exactly the kind of thoughtful architecture that makes self-hosting worthwhile.
Have you tried Rybbit or are you currently using other self-hosted analytics solutions? What features matter most to you in an analytics platform? Share your experiences in the comments below, or reach out to me on Twitter ↗️ / Reddit ↗️.
Happy analytics tracking!